(1757) - Battle of Hastenbeck 25th July 1757 - a 60,000 strong French army under the command of Marshal Louis Charles s'Estrees advance into Hanover in an attempt to draw the attention of Prussia out of the Bohemian theatre where the autro-prusso conflict grew fruitless and indecisive. William Augustus, Duke of Cumberland (King Goerge II's youngest son) prepares to meet them with a far smaller Hanoverian force of 35,000 men... Event Stages:Stage 1 | Chevert's early offensive | Siege Classes - Lines, LightsNormal SiegeWith both armies still deploying, the commander of the French right flank, General Francois de Chevert is hastily ordered to engage the Hanoverian troops at Voremberg. The village is heavily defended but will make the hanoverian position untenable if captured quickly... France | Hannover | 10 | 92nd (Lights)
10 | Nr19 (Line)
25 | 16th (Line)
30 | 33rd (Line)
15 | 73e (Line)
10 | VG (Line)
Total: (100) | 10 | k.k. PK (Lights)
15 | 18pp (Line)
10 | 19th (Line)
15 | Nr21 (Line)
20 | 25pp (Line)
30 | 45th (Line)
Total: (100) |
Stage 2 | Cumberland's blunder | Admin Classes - Lines, LightsAdmin controlled BattleHaving narrowly secured Voremberg, Cumberland positions his entire army in a line from Hamelin to Voremberg with his left flank anchored on a formidable hill known as the Obensburg. The Hanoverians believe this position and the surrounding woodland to be impassible, leaving a measly three battalions of Jagers to defend it's summit...France | Hannover | 10 | 92nd (Line)
25 | 16th (Line)
15 | 18pp (Line)
10 | Nr19 (Line)
15 | Nr21 (Line)
30 | 33rd (Line)
15 | 73e (Line)
10 | VG (Line)
Total: (130) | 10 | k.k. PK (Rifles)
10 | 19th (Rifles)
20 | 25pp (Rifles)
30 | 45th (Rifles)
Total: (70) |
Stage 3 | Hanoverian counter-attack | Battle Classes - Line, Lights, CavalryNormal BattleDespite a heroic defence the Hanoverian jaegers are forced from the summit of Obensburg by the French. Cumberland orders his reserves and grenadier battlalions to recapture the Obensbur, else lose his left-flank entirely...France | Hannover | 10 | 33rd (Cavalry)
10 | 92nd (Lights)
25 | 16th (Line)
10 | Nr19 (Line)
20 | 33rd (Line)
15 | 73e (Line)
10 | VG (Line)
Total: (100) | 10 | 19th (Cavalry)
10 | k.k. PK (Lights)
15 | 18pp (Line)
15 | Nr21 (Line)
20 | 25pp (Line)
30 | 45th (Line)
Total: (100) |
Stage 4 | D'Armentiere's push | Battle Classes - Lines, Lights, CavalryNormal BattleHaving lost their left flank at Obensburg, the Hanoverians are now in an extremely precarious position. The French General d'Armentiere chooses this opportunity to begin the main assault on the centre of Cumberland's line, fighting over the ruins of the almost entirely destroyed village of Voremberg...France | Hannover | 10 | 33rd (Cavalry)
10 | 92nd (Lights)
25 | 16th (Line)
10 | Nr19 (Line)
20 | 33rd (Line)
15 | 73e (Line)
10 | VG (Line)
Total: (100) | 10 | 19th (Cavalry)
10 | k.k. PK (Lights)
15 | 18pp (Line)
15 | Nr21 (Line)
20 | 25pp (Line)
30 | 45th (Line)
Total: (100) |
Stage 5 | Cumberland's Withdrawl | Escort Classes - Lines, Lights, CavalryEscort Round, Hanover must protect it's Artillery trains from the French pursuers, reaching the end of the road with at least 1 train to win the round! Unlimited Lives, melee only (wet powder). Please note this is our first attempt at this round type using Infantry (usually use attacking cavalry with FiC permitted), please do provide feedback on this round so we know whether to include/alter in the future!The Hanoverian grand battery is unable to repulse the oncomming French attacks and is withdrawn with the aid of German reserves, along with the rest of Cumberland's army. The retreat is closely hounded by the French, intent on capturing as many of their artillery as possible...France | Hannover | 10 | 33rd (Cavalry)
10 | 92nd (Lights)
10 | Nr19 (Line)
20 | 33rd (Line)
15 | 73e (Line)
10 | VG (Line)
Total: (75) | 10 | 19th (Cavalry)
10 | k.k. PK (Lights)
25 | 16th (Line & Arty-train)
15 | 18pp (Line)
15 | Nr21 (Line & Arty-train)
20 | 25pp (Line & Arty-train)
30 | 45th (Line & Arty-train)
Total: (125) |
(1789-1795) - Revolutionary Wars
TBC
Event Stages:Stage 1 | Storming the Bastille | Siege Classes - Lines, MobNormal Siege...Royalists | Republicans | 10 | 92nd (Line)
10 | 4pp (Line)
25 | 16th (Line)
10 | Nr19 (Line)
30 | 33rd (Line)
10 | VG (Line)
Total: (95) | 10 | 6e (mob)
10 | k.k. PK (mob)
10 | 3e (mob)
15 | 18pp (mob)
15 | Nr21 (mob)
20 | 25pp (mob)
30 | 45th (mob)
15 | 73e (mob)
Total: (125) |
Stage 2 | Battle of Valmy | Battle Classes - Lines, Lights, CavalryNormal BattleSeptember 1792 - The Prussians are approaching Paris, advancing through Verdun as nothing stands in their way except the shambles of the French army, under the command of Charles François Dumouriez and François Christophe Kellermann. The Prussians expect an easy victory...Prussia | French Republic | 10 | 33rd (Cavalry)
10 | 92nd (Lights)
10 | 4pp (Line)
25 | 16th (Line)
15 | 18pp (Line)
10 | Nr19 (Line)
20 | 33rd (Line)
10 | VG (Line)
Total: (110) | 10 | 6e (Cavalry)
10 | k.k. PK (Lights)
10 | 3e (Line)
15 | Nr21 (Line)
20 | 25pp (Line)
30 | 45th (Line)
15 | 73e (Line)
Total: (110) |
Stage 3 | Battle of Jemappes | Battle Classes - Line, Lights, CavalryNormal BattleNovember 1792 - After the battle of Valmy on the 20th of September the French army stood up to an artillery bombardment, proving that it would not flee at the first sign of opposition. After they defeated the coalition forces of Prussia and Austria, Charles Dumouriez, the commander of the Armée du Nord, had a free path to move onto the Austrian held Netherlands but the Austrians wouldn’t give up the territory without one last fight...Austria | French Republic | 10 | 33rd (Cavalry)
10 | 92nd (Lights)
10 | 4pp (Line)
25 | 16th (Line)
15 | 18pp (Line)
10 | Nr19 (Line)
20 | 33rd (Line)
10 | VG (Line)
Total: (110) | 10 | 6e (Cavalry)
10 | k.k. PK (Lights)
10 | 3e (Line)
15 | Nr21 (Line)
20 | 25pp (Line)
30 | 45th (Line)
15 | 73e (Line)
Total: (110) |
Stage 4 | Battle of Fleurus | Conquest Classes - Lines, Lights, CavalryNormal ConquestJune 1794 - The French are advancing towards Austrian held Netherlands but the Austrians will put in one last stand against the them; The French hope to decisively defeat the Austrians and regain control of territory to act as a buffer against further aggression to French interests. Here the French utilize the hot air balloon for reconnaissance, representing its first documented strategic use.Austria | French Republic | 10 | 33rd (Cavalry)
10 | 92nd (Lights)
10 | 4pp (Line)
25 | 16th (Line)
15 | 18pp (Line)
10 | Nr19 (Line)
20 | 33rd (Line)
10 | VG (Line)
Total: (110) | 10 | 6e (Cavalry)
10 | k.k. PK (Lights)
10 | 3e (Line)
15 | Nr21 (Line)
20 | 25pp (Line)
30 | 45th (Line)
15 | 73e (Line)
Total: (110) |
Stage 5 | Paris, 13 Vendémiaire | Siege Classes - Lines, MobAdmin Controlled to Start, then Normal Siege, 3 livesThe Republic is now established but currently not safe at all; with Austrian spy's all over Paris it's hard to keep control of the people. Austria has already sent it's army towards French borders and things are not looking good for the newly founded Republic. When the Royalists hear about the Austrian army, they decide to rise up against the Directory authority. The Republicans decide to take action and have appointed the young artillery officer to defeat the mob. Outnumbered six to one, Napoleon Bonaparted hopes to crush the royalists forces marching on the Convention, thus saving the Republic from damnation! Royalists | Republicans | 10 | 92nd (Mob)
10 | 4pp (Mob)
25 | 16th (Mob)
15 | 18pp (Mob)
10 | Nr19 (Mob)
15 | Nr21 (Mob)
30 | 33rd (Mob)
10 | VG (Mob)
Total: (125) | 10 | 6e (Line)
10 | k.k. PK (Line)
10 | 3e (Line)
20 | 25pp (Line)
30 | 45th (Line)
15 | 73e (Line)
Total: (95) |
(1796) - Italian Campaign General Bonapartes success at Toulon and in protecting the Republic in Paris earned him the undying gratitude of the French Directory, leading to his first command of the French army of Italy. Having already taken a huge step from his humble beginnings, the 'little corporal' still holds further ambition, but first he must soundly defeat the Austrians in the field... Event Stages:Stage 1 | Battle of Lodi | Battle Classes - Lines, CavalryNormal BattleAttempting to fully engage and cut-off the Austrian army retreating across the river Lodi, Bonaparte throws his advance guard into action in the early hours of the 10th of May. The French must break-through the Austrian line of retreat across the bridge, in order to cut-off the bulk of their army and force them to surrender... Austria | France | 10 | RDL (Cavalry)
10 | 1stEB (Line)
15 | 16th (Line)
20 | 92nd (Line)
15 | 96y (Line)
10 | RDL (Line)
Total: (80) | 10 | 33rd (Cavalry)
10 | 13-ty (Line)
15 | 18pp (Line)
10 | Nr21 (Line)
15 | 33rd (Line)
15 | LG (Line)
10 | HLI (Line)
Total: (85) |
Stage 2 | Battle of Castiglion, Centre | Battle Classes - Lines, CavalryNormal BattleCastiglion was one of the first of four major actions of the Italian campaign; The battle begun with a feint frontal assault by the French, all along the Austrian front line...Austria | France | 10 | RDL (Cavalry)
10 | 1stEB (Line)
15 | 16th (Line)
20 | 92nd (Line)
15 | 96y (Line)
10 | RDL (Line)
Total: (80) | 10 | 33rd (Cavalry)
10 | 13-ty (Line)
15 | 18pp (Line)
10 | Nr21 (Line)
15 | 33rd (Line)
15 | LG (Line)
10 | HLI (Line)
Total: (85) |
Stage 3 | Battle of Castiglion, Left flank | Siege Classes - Line, Cavalry, Horse ArtilleryNormal Siege | Horse Artillery allowed to use canister ONLYWithin minutes of attacking the entire Austrian front, Bonaparate throws his weight against a redoubt, anchoring the left of the Austrian line. The redoubt though hastily prepared, presents a difficult obstacle; the french attack with combined arms of grenadiers, dragoons and horse artillery. The Austrians must hold on to the defences for as long as possible and knock the enemy artillery out of action if they can...Austria | France | 10 | RDL (Cavalry)
10 | 1stEB (Line)
15 | 16th (Line)
20 | 92nd (Line)
15 | 96y (Line)
10 | RDL (Line)
Total: (80) | 10 | 33rd (Cavalry)
10 | 13-ty (Line)
15 | 18pp (Line)
10 | Nr21 (Line)
15 | 33rd (Line)
15 | LG (Line)
10 | HLI (Line)
Total: (85) |
Stage 4 | Battle of Arcole, the centre | Battle Classes - Lines, CavalryNormal BattleAfter the successful siege of Mantua by Bonaparte's army, Austrian commander Alvinczi moves West with 24,000 men to recover Austrian losses. Bonaparte makes a daring move to the south to outflank their position, striking across the adige river near the village of Arcole...Austria | France | 10 | RDL (Cavalry)
10 | 1stEB (Line)
15 | 16th (Line)
20 | 92nd (Line)
15 | 96y (Line)
10 | RDL (Line)
Total: (80) | 10 | 33rd (Cavalry)
10 | 13-ty (Line)
15 | 18pp (Line)
10 | Nr21 (Line)
15 | 33rd (Line)
15 | LG (Line)
10 | HLI (Line)
Total: (85) |
Stage 5 | Battle of Arcole, storming the bridge | Siege Classes - Lines, ArtilleryNormal Battle, numbers in favour of the French due to the map; Austrians hold an advantageous position overlooking a single river crossing.The battle having raged for some hours, a stalemate begins to set in across the line. Bonaparte, afraid that he may be forced to retreat back across the adige river, instead leads a bold attack across the Alpone river towards Arcole itself. The bridge is fiercly defended by Austrian grenadiers of Brigido's division, who will hold the position at all costs...Austria | France | 15 | 16th (Line)
20 | 92nd (Line)
15 | 96y (Line)
20 | RDL (Line)
Total: (70) | 10 | 1stEB (Line)
10 | 13-ty (Line)
15 | 18pp (Line)
10 | Nr21 (Line)
25 | 33rd (Line)
15 | LG (Line)
10 | HLI (Line)
Total: (95) |
(1798) - Egyptian Campaign
Having seen the benefits of Britain's profitable colonies, France's Directory listened to Bonaparte's idea to invade Egypt; expelling the ruling Mamelukes and establishing a modern style of government sympathetic to France would strengthen their trade and weaken Britains position. Early success however against the Mameluke dynsaty was overshadowed by the defeat of the French fleet at the hands of Nelson. After a relatively short period of occupation the French forces were eventually forced to leave for good with British forces landing and laying siege to Alexandria.flag-spawning Stage 1 | Landing at Aboukir bay Classes - Line, ArtilleryFlag-Spawning Siege round - Teams win by reducing enemy tickets to 0 like usual but on a fortified map; each team should try and secure key defenses from which to have an advantage over their opposition. FiC and RiC permitted. Each regiment may have up to 1 sapper & 2 artilleryman.Determined to drive out the last remnants of Napoleons Expedition in Egypt at Alexandria, British forces attempt a landing at Aboukir bay. A small French force holds the beach head, their artillery however may prove to be the British downfall as the landing parties make their way ponderously inland...Britain | France | 25 | 33rd (1st Infantry)
10 | 24th (2nd Infantry)
10 | 1stEB (3rd Infantry)
10 | [CEL]1er (Footguard)
15 | 115e (Light Infantry)
10 | HLI (Dragoons)
Total: (80) | 15 | [AF]1er (1st Infantry)
20 | 23rd (2nd Infantry)
10 | Nr21 (3rd Infantry)
15 | 54th (Footguard)
10 | 1BIR (Light Infantry)
10 | TC (Dragoons)
Total: (80) |
Stage 2 | Alexandria, first offensive Classes - Lines, Lights, CavalryFlag-Spawning round, Admin Controlled to start, then reduce enemy tickets to 0.
To start France & UK remain at spawn. UK regiments selected for picket (sentry) duty move out to the picket line (marked by line of rough rocks across the map). After 2 mins (admin notified) France may move out and begin their attack. UK can only move out when the French team is discovered - France should coordinate an attack together or try to move round the picket to surprise the main team. Regiments on picket can spread out and fire one shot on sighting the enemy, then return to their unit. Once the French attack has been discovered proceed with normal round and rules.Having successfully landed, the British press on towards Alexandria. The French however seize the initiative and commence their own attack in one final pitched battle, the offensive hitting home in the early hours of 21st March. A confused fight ensues in the darkness as the French offensive primarily engages the British center in force, attempting to drive a wedge here and sever the British line in two. The British pickets are pushed unexpectedly at 3am as the French offensive begins... Britain | France | 10 | 33rd (Hussars)
15 | 33rd (1st Infantry)
10 | 24th (2nd Infantry)
10 | 1stEB (3rd Infantry)
10 | [CEL]1er (Footguard)
15 | 115e (Light Infantry)
10 | HLI (Dragoons)
Total: (80) | 10 | 23rd (Hussars)
15 | [AF]1er (1st Infantry)
10 | 23rd (2nd Infantry)
10 | Nr21 (3rd Infantry)
15 | 54th (Footguard)
10 | 1BIR (Light Infantry)
10 | TC (Dragoons)
Total: (80) |
Stage 3 | Alexandra, Roman Ruins Classes - Lines, Lights CavalryNormal Flag-Spawning round - reduce enemy tickets to 0.The initial french attack in the centre is met with some early success in the darkness, with one french division passing straight through the British line towards the old roman ruins to the rear; the 42nd highland regiment stands alone to defend the ruins and prevent the French from rolling up the British line entirely... Britain | France | 10 | 33rd (Hussars)
15 | 33rd (1st Infantry)
10 | 24th (2nd Infantry)
10 | 1stEB (3rd Infantry)
10 | [CEL]1er (Footguard)
15 | 115e (Light Infantry)
10 | HLI (Dragoons)
Total: (80) | 10 | 23rd (Hussars)
15 | [AF]1er (1st Infantry)
10 | 23rd (2nd Infantry)
10 | Nr21 (3rd Infantry)
15 | 54th (Footguard)
10 | 1BIR (Light Infantry)
10 | TC (Dragoons)
Total: (80) |
Stage 4 | Stand fast 28th Classes - Line, CavalryObjective based Flag-Spawning Battle round - UK form 2 ranks at spawn and hold their position, teams win by reducing enemy tickets to 0. High flag capture cost so capturing these should be a French priority (2 UK flags). French cavalry choose your class but bear in mind that if you share it with another regiment you must wait for all of the class to die before you will respawn.With the battle in the ruins to the rear still raging, the British right flank finds itself momentarily cut-off from the rest of the British line and threatened from both front and rear; the 28th Foot, strung out in a two rank-deep line, famously give the order for the front rank to stay as they are and the rear to about face! The regiment fights back-to-back for its very survival as the French relentlessly engage their position...Britain | France | 15 | 33rd (1st Infantry)
10 | 24th (1st Infantry)
10 | Nr21 (1st Infantry)
10 | 1BIR (1st Infantry)
10 | 1stEB (Footguard)
10 | [CEL]1er (Footguard)
15 | 115e (Footguard)
10 | HLI (Footguard)
Total: (90) | 20 | 23rd (Cavalry)
10 | 33rd (Cavalry)
15 | [AF]1er (Cavalry)
15 | 54th (Cavalry)
10 | TC (Cavalry)
Total: (70) |
Event Stages:Stage 1 | Battle of Shubra Khit | Battle Classes - Lines, Lights, CavalryNormal BattleThis was the first major engagement of the campaign. On their march to Cairo, the French army encountered an Ottoman army consisting of Mamluk cavalry and drafted Fellahins under Murad Bey. Napoleon lined his forces up into infantry squares, a tactic which helped repel the Mamluk cavalry, largely due to their inability to penetrate them without suffering severe casualties. A naval battle also occurred, with an Ottoman flotilla being repelled by a French flotilla.Mamluk Dynasty | France | 10 | 33rd (Cavalry)
10 | BC (Lights)
10 | 4pp (Line)
15 | 16th (Line)
15 | 18pp (Line)
15 | Nr21 (Line)
20 | 33rd (Line)
15 | 73e (Line)
Total: (110) | 10 | 45th (Cavalry)
10 | 92nd (Lights)
10 | 1er (Line)
10 | 3e (Line)
20 | 25pp (Line)
30 | 45th (Line)
15 | 92nd (Line)
Total: (105) |
Stage 2 | Battle of the Pyramids | Siege Classes - Lines, CavalryHold the Square - France have 2 minutes to form square, from 8:00 the Mamluks may charge (unlimited lives). Each Regiment on France may take 1 gunner and share the atillery at the squares corners.The most iconic battle of the entire campaign, the battle of the Pyramids took place actually quite far away from the Pyramids but they were faintly visible in the distance, thus Napoléon used this oppurtunity to name the battle after them, for it to be more memorable and to have greater gravitas. The battle can be easily explained as the French formed divisional squares, supplies in the middle of them and artillery pieces at the corners.Mamluk Dynasty | France | 10 | BC (Cavalry)
10 | 4pp (Cavalry)
15 | Nr21 (Cavalry)
30 | 33rd (Cavalry)
15 | 73e (Cavalry)
Total: (80) | 10 | 1er (Line)
10 | 3e (Line)
15 | 16th (Line)
15 | 18pp (Line)
20 | 25pp (Line)
40 | 45th (Line)
25 | 92nd (Line)
Total: (135) |
Stage 3 | Battle of the Nile | Conquest Classes - Marines, ArtilleryNormal Conquest, FiC and RiC allowed, each reg may take one or two gunners, move out on boats in crews of 5+"The unexampled series of our naval triumphs has received fresh splendour from the memorable and decisive action, in which a detachment of my fleet, under the command of Rear-Admiral Lord Nelson, attacked, and almost totally destroyed a superior force of the enemy, strengthened by every advantage of situation." These were the words of King George III when addressing the parliament when finding out about the battle. The battle was brutal and almost completely destroyed the French navy (only a few ships managed to escape, one of which was commanded by Villeneuve). In the end, the battle proved to be a decisive factor in the French campaign as with no route to France meant no supplies or fresh troops.Britain | France | 10 | BC (Marines/Crew)
10 | 4pp (Marines/Crew)
15 | 16th (Marines/Crew)
15 | 18pp (Marines/Crew)
15 | Nr21 (Marines/Crew)
30 | 33rd (Marines/Crew)
15 | 73e (Marines/Crew)
Total: (110) | 10 | 1er (Marines/Crew)
10 | 3e (Marines/Crew)
20 | 25pp (Marines/Crew)
40 | 45th (Marines/Crew)
25 | 92nd (Marines/Crew)
Total: (105) |
Stage 4 | Battle of Aboukir | Battle Classes - Lines, Lights, CavalryNormal BattleThe battle between the French and the Ottomans with the French claming the victory, aptly named 'of Aboukir' as Napoléon wanted to avenge the terrible defeat suffered at sea.Mamluk Dynasty | France | 10 | 33rd (Cavalry)
10 | BC (Lights)
10 | 4pp (Line)
15 | 16th (Line)
15 | 18pp (Line)
15 | Nr21 (Line)
20 | 33rd (Line)
15 | 73e (Line)
Total: (110) | 10 | 45th (Cavalry)
10 | 92nd (Lights)
10 | 1er (Line)
10 | 3e (Line)
20 | 25pp (Line)
30 | 45th (Line)
15 | 92nd (Line)
Total: (105) |
Stage 5 | Siege of El Arish | Siege Classes - Lines, Lights, ArtilleryNormal Siege, Cav may choose line if they wish...Mamluk Dynasty | France | 10 | 33rd (Cavalry)
10 | BC (Lights)
10 | 4pp (Line)
15 | 16th (Line)
15 | 18pp (Line)
15 | Nr21 (Line)
20 | 33rd (Line)
15 | 73e (Line)
Total: (110) | 10 | 45th (Cavalry)
10 | 92nd (Lights)
10 | 1er (Line)
10 | 3e (Line)
20 | 25pp (Line)
30 | 45th (Line)
15 | 92nd (Line)
Total: (105) |
(1801) - Egyptian Campaign Event Stages:Stage 1 | Landing at Aboukir bay | Siege Classes - Lines, Lights, ArtilleryNormal Siege, 2 Lives, each reg may take 1 artillerymanDetermined to drive out the last remanents of Napoleons Expedition in egypt at Alexandria, British forces attempt a landing at Aboukir bay. A small French force holds the beach head, their artillery however may prove to be the British downfall as the landing parties make their way ponderously inland...[/i] France | Britain | 10 | BC (Lights)
10 | 1er (Line)
10 | 4pw (Line)
15 | 18pp (Line)
20 | 25pp (Line)
30 | 33rd (Line)
15 | 73e (Line)
Total: (110) | 10 | 92nd (Lights)
10 | 1stEB (Line)
10 | 3e (Line)
15 | 16th (Line)
15 | Nr21 (Line)
35 | 45th (Line)
15 | 92nd (Line)
Total: (110) |
Stage 2 | Alexandria, first offensive | Admin Classes - Lines, Lights, CavalryAdmin Controlled to start, then proceed with Normal Battle:
UK take positions at the 3 reserve pickets as directed (marked by camp fires) and post half of their men as a dispersed picket lines towards the enemy spawn. From 56:00 France may attack (preferably together) any of these positions they choose. When attacked UK's picket may fire 1 shot (FoL permitted) and fall back on their reserve (camp fire), all units then proceed with Normal Battle using normal rules.Having successfully landed, the British press on towards Alexandria. The French however sieze the initative and commence their own attack in one final pitched battle, the offensive hitting home in the early hours of 21st March. A confused fight ensues in the darkness as the French offensive primarily engages the british center in force, attempting to drive a wedge here and sever the British line in two. The British piquets are pushed unexpectedly at 3am as the French offensive begins... France | Britain | 10 | 33rd (Cavalry)
10 | BC (Lights)
10 | 1er (Line)
10 | 4pw (Line)
15 | 18pp (Line)
20 | 25pp (Line)
20 | 33rd (Line)
15 | 73e (Line)
Total: (110) | 10 | 45th (Cavalry)
10 | 92nd (Lights)
10 | 1stEB (Line)
10 | 3e (Line)
15 | 16th (Line)
15 | Nr21 (Line)
25 | 45th (Line)
15 | 92nd (Line)
Total: (110) |
Stage 3 | Alexandra, Roman Ruins | Battle Classes - Lines, Lights CavalryNormal BattleThe inital french attack in the centre is met with some early success in the darkness, with one french division passing straight through the British line towards the old roman ruins to the rear; the 42nd highland regiment stands alone to defend the ruins and prevent the French from rolling up the British line entirely... France | Britain | 10 | 33rd (Cavalry)
10 | BC (Lights)
10 | 1er (Line)
10 | 4pw (Line)
15 | 18pp (Line)
20 | 25pp (Line)
20 | 33rd (Line)
15 | 73e (Line)
Total: (110) | 10 | 45th (Cavalry)
10 | 92nd (Lights)
10 | 1stEB (Line)
10 | 3e (Line)
15 | 16th (Line)
15 | Nr21 (Line)
25 | 45th (Line)
15 | 92nd (Line)
Total: (110) |
Stage 4 | Alexandria, the centre | Battle Classes - Lines, Lights, CavalryNormal BattleThe fighting in the british centre continues to rage, with the first rays of morning beginning to illuminate the firefight... France | Britain | 10 | 33rd (Cavalry)
10 | BC (Lights)
10 | 1er (Line)
10 | 4pw (Line)
15 | 18pp (Line)
20 | 25pp (Line)
20 | 33rd (Line)
15 | 73e (Line)
Total: (110) | 10 | 45th (Cavalry)
10 | 92nd (Lights)
10 | 1stEB (Line)
10 | 3e (Line)
15 | 16th (Line)
15 | Nr21 (Line)
25 | 45th (Line)
15 | 92nd (Line)
Total: (110) |
Stage 5 | Alexandria, Stand Fast 28th! | Siege Classes - Lines, Lights, ArtilleryHold the Line Siege, UK form a double rank line with the siege capture flag in the centre (directed by admin). France position themselves around them ready to charge. When the timer reaches 5:00 the French may begin their attack - UK attempt to hold your formation as long as possible with 2 lives.With the battle in the ruins to the rear still raging, the british right flank finds itself momentarily cut-off from the rest of the british line and threatended from both front and rear; the 28th Foot, strung out in a two rank-deep line, famously give the order for the front rank to stay as they are and the rear to about face! The regiment fights back-to-back for its very survivial as the French relentlessly engage their position... France | Britain | 10 | 33rd (Cavalry)
10 | BC (Cavalry)
10 | 1er (Cavalry)
10 | 4pw (Cavalry)
15 | 18pp (Cavalry)
20 | 25pp (Cavalry)
Total: (75) | 10 | 1stEB (Line)
10 | 3e (Line)
15 | 16th (Line)
15 | Nr21 (Line)
20 | 33rd (Line)
35 | 45th (Line)
15 | 73e (Line)
25 | 92nd (Line)
Total: (145) |
(1800) - Battle of Marengo UNDER CONSTRUCTION!  (1805) - Battle of Austerlitz
The Battle of Austerlitz can be considered one of the most decisive engagements of the Napoleonic era; The Grande Armee isolated at the full extent of its lines of communication with an array of forces opposing with superior numbers. At Austerlitz Napoleon tempted the combined Austrian and Russian army into attacking before they could be reinforced and despite their inferiority in numbers Napoleon claimed a Decisive Victory. In essence this was gained by the allied army over extending itself to engage the flanks of the French force, which then in turn struck hard in the allied centre and severed the combined Russian and Austrian army in to. The battle therefore represents not only a success against a force that was numerically superior but also a triumph in which some 36,000 allied soldier were captured, wounded or killed.Event Stages:flag-spawning Stage 1 | Defending Telnitz Classes - Line, ArtilleryFlag-Spawning Siege round - Teams win by reducing enemy tickets to 0 like usual but on a fortified map; each team should try and secure key defenses from which to have an advantage over their opposition. FiC and RiC permitted. Each regiment may have 1 sapper & 1 artilleryman.Believing the French army to be withdrawing, the Allies commit an early offensive on the French right which appears weak. Austrian and Russian divisions assault the village of Tenitz in force at 7:00am, both sides concealed in the early morning darkness and thick fog...Allies | France | 25 | 33rd (Militia)
20 | LG (Simbersky)
10 | 92nd (Pavlovsky)
10 | HLI (Footguard)
10 | BIR (Dragoons)
00 | SPACE (Cuirassiers)
Total: (75) | 10 | 1er (45e)
25 | 23rd (84e)
15 | 63rd (Legion)
15 | 1erFusGre (Footguard)
10 | 24th (15e)
00 | SPACE (Dragoons)
Total: (75) |
Stage 2 | Bagration's Offensive Classes - Line, CavalryFlag-Spawning Battle round - Teams win by reducing enemy tickets to 0.In an attempt to fully encircle the French position, the Russians under Bagration also commit to heavily engaging the French left; sweeping hills and plains allow large amounts of troops and cavalry to be committed... Allies | France | 10 | 33rd (Hussars)
15 | 33rd (Militia)
20 | LG (Simbersky)
10 | 92nd (Pavlovsky)
10 | HLI (Footguard)
10 | BIR (Dragoons)
00 | SPACE (Cuirassiers)
Total: (75) | 10 | 23rd (Hussars)
10 | 1er (45e)
15 | 23rd (84e)
15 | 63rd (Legion)
15 | 1erFusGre (Footguard)
10 | 24th (15e)
00 | SPACE (Dragoons)
Total: (75) |
Stage 3 | Soult's Attack on Pratzen Classes - LineFlag-Spawning round, Admin Controlled to start - reduce enemy tickets to 0 like usual but the Allies must defend the Pratzen heights.Both flanks of the battle are now fully engaged, with more troops every hour coming down from the Pratzen heights to support the allied offensive at Telnitz. Soult's Corps - hidden up to this point by the morning fog - throws itself into action at this crucial moment, advancing straight up the center of the battle towards the heights. Very few allied troops occupy this position to repell them...Allies | France | 25 | 33rd (Militia)
20 | LG (Militia)
10 | 92nd (Militia)
10 | HLI (Militia)
10 | BIR (Militia)
00 | SPACE (Militia)
Total: (75) | 10 | 1er (45e)
25 | 23rd (45e)
15 | 63rd (45e)
15 | 1erFusGre (45e)
10 | 24th (45e)
00 | SPACE (45e)
Total: (75) |
Stage 4 | Imperial Guard Counterattack Classes - Line, CavarlyFlag-Spawning Battle round - Teams win by reducing enemy tickets to 0.Soults Corps has smashed through the centre of the Allied army, capturing the heights of Pratzen and almost guaranteeing complete victory. All that stands in the way is one last reserve, the Russian Imperial Guard. St Hilaire's division of Soult's Corps finds itself surrounded by Russian Guard cavalry and Infantry, fighting for its survivial atop the uneven ground of Pratzen... Allies | France | 10 | 33rd (Hussars)
15 | 33rd (Militia)
20 | LG (Simbersky)
10 | 92nd (Pavlovsky)
10 | HLI (Footguard)
10 | BIR (Dragoons)
00 | SPACE (Cuirassiers)
Total: (75) | 10 | 23rd (Hussars)
10 | 1er (45e)
15 | 23rd (84e)
15 | 63rd (Legion)
15 | 1erFusGre (Footguard)
10 | 24th (15e)
00 | SPACE (Dragoons)
Total: (75) |
Stage 1 | Defending Telnitz | Siege Classes - Lines, Lights, ArtilleryNormal Siege, 2 Lives, each reg may take 1 artillerymanBelieving the French army to be withdrawing, the Allies commit an early offensive on the French right which appears weak. Austrian and Russian divisions assault the village of Tenitz in force at 7:00am, both sides concealed in the early morning darkness and thick fog...Allies | France | 10 | 92nd (Lights)
10 | 1er (Line)
10 | 4pw (Line)
15 | Nr21 (Line)
20 | 25pp (Line)
30 | 33rd (Line)
15 | 92nd (Line)
Total: (110) | 10 | BC (Lights)
10 | 1stEB (Line)
10 | 3e (Line)
15 | 16th (Line)
15 | 18pp (Line)
35 | 45th (Line)
15 | 73e (Line)
Total: (110) |
Stage 2 | Bagration's Offensive | Battle Classes - Lines, Lights, CavalryNormal BattleIn an attempt to fully encircle the French position, the Russians under Bagration also commit to heavily engaging the French left; sweeping hills and plains allow large amounts of troops and cavalry to be committed...Allies | France | 10 | 33rd (Cavalry)
10 | 92nd (Lights)
10 | 1er (Line)
10 | 4pw (Line)
15 | Nr21 (Line)
20 | 25pp (Line)
20 | 33rd (Line)
15 | 92nd (Line)
Total: (110) | 10 | 45th (Cavalry)
10 | BC (Lights)
10 | 1stEB (Line)
10 | 3e (Line)
15 | 16th (Line)
15 | 18pp (Line)
25 | 45th (Line)
15 | 73e (Line)
Total: (110) |
Stage 3 | Soult's Attack on Pratzen | Admin Classes - LinesAdmin Controlled Battle; both sides form up as directed by the admins.Both flanks of the battle are now fully engaged, with more troops every hour coming down from the Pratzen heights to support the allied offensive at Telnitz. Soult's Corps - hidden up to this point by the morning fog - throws itself into action at this crucial moment, advancing straight up the center of the battle towards the heights. Very few allied troops occupy this position to repell them... Allies | France | 10 | 4pw (Line)
15 | Nr21 (Line)
20 | 25pp (Line)
30 | 33rd (Line)
25 | 92nd (Line)
Total: (100) | 10 | BC (Line)
10 | 1stEB (Line)
10 | 1er (Line)
10 | 3e (Line)
15 | 16th (Line)
15 | 18pp (Line)
35 | 45th (Line)
15 | 73e (Line)
Total: (120) |
Stage 4 | Cavalry Counterattack | Siege Classes - Lines, CavalrySiege, use the broken ground to help defend against the cavalry, but maintain formation when reloading.Soults Corps has smashed through the centre of the Allied army, capturing the heights of Pratzen and almost guaranteeing complete victory. All that stands in the way of the Allies flanks each being picked off one by one is one last reserve, the Russian Imperial Guard. St Hilaire's division of Soult's Corps finds itself surrounded by Russian Guard cavalry, fighting for its survivial on the uneven ground atop Pratzen... Allies | France | 10 | 4pw (Cavalry)
15 | Nr21 (Cavalry)
30 | 33rd (Cavalry)
25 | 92nd (Cavalry)
Total: (80) | 10 | BC (Line)
10 | 1er (Line)
10 | 1stEB (Line)
10 | 3e (Line)
15 | 16th (Line)
15 | 18pp (Line)
20 | 25pp (Line)
35 | 45th (Line)
15 | 73e (Line)
Total: (140) |
Stage 5 | Imperial Guard Counterattack | Battle Classes - Lines, Lights, CavalryNormal BattleThe Russian Guard cavalry make some headway towards recapturing the heights, even managing to capture an Eagle. Napoleon commits his own Guard cavalry however to drive the spent russians to retreat. With the Russian cavalry put to flight, the Guard Infantry still remains to attempt to save the entire Allied army from defeat...Allies | France | 10 | 33rd (Cavalry)
10 | 92nd (Lights)
10 | 1er (Line)
10 | 4pw (Line)
15 | Nr21 (Line)
20 | 25pp (Line)
20 | 33rd (Line)
15 | 92nd (Line)
Total: (110) | 10 | 45th (Cavalry)
10 | BC (Lights)
10 | 1stEB (Line)
10 | 3e (Line)
15 | 16th (Line)
15 | 18pp (Line)
25 | 45th (Line)
15 | 73e (Line)
Total: (110) |
(1806) - Prussian Campaign
Where - 33rd_Prussian_Campaign_1806! Napoleon's campaign against the Prussians in 1806 represented the first half of the war of the fourth coalition, formed against France shortly after the third coalitions' defeat at Austerlitz in 1805. Prussia eagerly declares war before either of its coalition partners has time to come to their aid, so in October Napoleon launches the Grande Armee across the Saxon border towards Berlin. Due to the haste of the invasion, intelligence on the Prussian army whereabouts is scarce; The French advance with all their corps within a days march of each other, to seek out the enemy and defeat in detail. The Prussian army is of a significant size but is plagued by outdated organisation and aging commanders, how will the legacy of Fredrick the Great stand up to the modernised Grande Armee...
Flag-spawning Stage 1 | Saalfeld Classes - Line, CavalryFlag-Spawning Battle round - Teams win by reducing enemy tickets to 0.After an initial clash at Schleiz on October 9th, French and Prussian troops under Marshal Lannes and Prince Louis Ferdinand meet at Saaleld on October 10th. Confusing orders from his commander have caused the Prince to deploy with his back to the river Saale, believing the greater Prussian army will be maneuvering in his direction and support him if he is engaged. Marshal Lannes swiftly takes advantage of the relatively minor force occupying the ground and attacks the enemy positions from all sides...Prussia | France | 10 | 23rd (Hussars)
10 | 1BIR (1st Infantry)
10 | 24th (2nd Infantry)
10 | 1stEB (3rd Infantry)
10 | 23rd (4th Infantry)
20 | LG (Footguard)
10 | HLI (Dragoons)
Total: (80) | 10 | 33rd (Hussars)
15 | [AF]1er (1st Infantry)
15 | 33rd (2nd Infantry)
10 | 4eMG (3rd Infantry)
10 | 115e (Footguard)
10 | [CEL]1er (4th Infantry)
10 | TC (Dragoons)
Total: (80) |
Stage 2 | The Charge of Prince Louis Classes - CavalryAdmin controlled Battle Round - both teams wait at spawn to be directed by the adminsJust hours into the engagement it is clear to Prince Louis that he is not only soon to be encircled but that there is no support nearby to assist him. With his cavalry still fresh he orders a general withdrawal of his army whilst personally leading a charge against the enemy centre to hold Lannes at bay...Prussia | France | 20 | 23rd (Hussars)
10 | 1BIR (Hussars)
10 | 24th (Hussars)
10 | 1stEB (Hussars)
10 | LG (Hussars)
10 | HLI (Hussars)
Total: (80) | 25 | 33rd (Hussars)
15 | [AF]1er (Hussars)
10 | 4eMG (Hussars)
10 | 115e (Hussars)
10 | [CEL]1er (Hussars)
10 | TC (Hussars)
Total: (80) |
Stage 3 | Jena Classes - Line, CavalryFlag-Spawning Battle round - Teams win by reducing enemy tickets to 0. France must play defensively as they have no cavalry support.On the 14th October the battle of Jena begins to slowly take shape, with the French seemingly at a great majority in numbers. With his flanks secured, Napoleon slowly moves his divisions across the river Saale and into his center. Ney however has his troops in position early and attacks the Prussian line prematurely, quickly finding himself isolated without support. The Prussians waste no time taking advantage of his plight, enveloping his division on all sides. Ney orders his entire division into a rough square and chooses to defend a junction on the road to Jena... Prussia | France | 10 | 23rd (Hussars)
10 | 33rd (Hussars)
10 | 1BIR (1st Infantry)
10 | 24th (2nd Infantry)
10 | 1stEB (3rd Infantry)
10 | 23rd (4th Infantry)
20 | LG (Footguard)
Total: (80) | 15 | [AF]1er (1st Infantry)
15 | 33rd (2nd Infantry)
10 | 4eMG (3rd Infantry)
10 | 115e (Footguard)
10 | [CEL]1er (4th Infantry)
10 | TC (Dragoons)
10 | HLI (Cuirassiers)
Total: (80) |
Stage 4 | Auerstadt Classes - Line, CavarlyFlag-Spawning Siege round - Teams win by reducing enemy tickets to 0 like usual but on a fortified map, each team should try and secure key defenses from which to have an advantage over their opposition. FiC and RiC permitted. Each regiment can have 1 sapper.As the battle at Jena rages Marshal Davout's 3rd corps advances in the direction of Auerstadt to the north, unaware that they are about to engage the bulk of the Prussian army alone. After a short skirmish and the arrival of a further Prussian division under marshal Blucher, the french troops retreat to defend the village of HassenHausen; it's low walls and buildings will have to serve as an effective defence against the overwhelming Prussian forces massing to attack...Prussia | France | 10 | 23rd (Hussars)
10 | 1BIR (1st Infantry)
10 | 24th (2nd Infantry)
10 | 1stEB (3rd Infantry)
10 | 23rd (4th Infantry)
20 | LG (Footguard)
10 | HLI (Dragoons)
Total: (80) | 10 | 33rd (Hussars)
15 | [AF]1er (1st Infantry)
15 | 33rd (2nd Infantry)
10 | 4eMG (3rd Infantry)
10 | 115e (Footguard)
10 | [CEL]1er (4th Infantry)
10 | TC (Dragoons)
Total: (80) |
Event Stages:Stage 1 - Rearguard at Schliez - LineBattle Siege (10mins)Spoiler Line, Lights, CavSiege with LineBattle Rules except FiC is permittedOn October 9th French troops clash with a Prussian/Saxon division near the village of Schliez, in time however it becomes clear that Bernadottes 1st corps vastly outnumbers the Allied divison so they begin to withdraw. As an aggressive prusuit ensues headed by Murat's cavalry, one Prussian batallion finds itself pinned between French cavalry behind and Infantry in front - they must fight on for as long as possible as they are engaged on all fronts... Prussia/Saxony | France | (10-15) - 33rd Cavalry Troop (Cavalry)
(10-15) - 33rd Light Company (Lights)
(15-20) - 25pp (Line)
(10-15) - 32nd (Line)
(15-20) - 33rd Line Company (Line)
(10-15) - VG_Gre (Line)
Total: (70 - 100) | (10-15) - 16th Cavalry Troop (Cavalry)
(10-15) - 92nd Light Company (Lights)
(20-25) - 16th Line Company (Line)
(20-25) - 45th (Line)
(10-15) - 92nd Line company (Line)
(5-10) - k.k. PK (Cavalry)
Total: (75 - 105) |
Spoiler Classes - Line, Cavalry.Admin Controlled Battle - Both teams infantry and France's cavalry form up together at spawn, await direction by admins.Underestimating the strength of the French corps approaching, Prince Louis Ferdinand of Prussia deploys his forces with their back to the river Saale on the 10th of October. Marshal Lannes swiftly takes advantage of the blunder and attacks the enemy positions in force... Prussia/Saxony | France | (10-15) - 33rd Cavalry Troop (Line)
(10-15) - 33rd Light Company (Line)
(15-20) - 25pp (Line)
(10-15) - 32nd (Line)
(15-20) - 33rd Line Company (Line)
(10-15) - VG_Gre (Line)
Total: (70 - 100) | (10-15) - 16th Cavalry Troop (Cavalry)
(10-15) - 92nd Light Company (Line)
(20-25) - 16th Line Company (Line)
(20-25) - 45th (Line)
(10-15) - 92nd Line company (Line)
(5-10) - k.k. PK (Cavalry)
Total: (75 - 105) |
Spoiler Lines, LightsNormal SiegeMarshal Davout's 3rd corps advances in the direction of Auerstadt, unaware of the large concentration of Prussian forces advancing towards him. The morning fog breaking and the arrival of a further Prussian division under marshal Blucher, the french troops choose to defend the village of HassenHausen; it's low walls and buildings will have to serve as an effective defence against the overwhelming Prussian forces massing to attack... Prussia/Saxony | France | (10-15) - 33rd Cavalry Troop (Line)
(10-15) - 33rd Light Company (Lights)
(15-20) - 25pp (Line)
(10-15) - 32nd (Line)
(15-20) - 33rd Line Company (Line)
(10-15) - VG_Gre (Line)
Total: (70 - 100) | (10-15) - 16th Cavalry Troop (Line)
(10-15) - 92nd Light Company (Lights)
(20-25) - 16th Line Company (Line)
(20-25) - 45th (Line)
(10-15) - 92nd Line company (Line)
(5-10) - k.k. PK (Line)
Total: (75 - 105) |
Spoiler Line, Lights, CavNormal BattleAt around the same time as the engagement at Hassenhausen, the battle of Jena begins to slowly take shape. With his flanks secured, Napoleon slowly moves his other divisions across the river Saale and into his center. Ney however has his troops in position early and attacks the Prussian line prematurely, quickly finding himself isolated without support. The Prussians waste no time taking advantage of his plight, enveloping his division on all sides. Ney orders his entire division into a rough square and chooses to defend a junction on the road to Jena... Prussia/Saxony | France | (10-15) - 33rd Cavalry Troop (Cavalry)
(10-15) - 33rd Light Company (Lights)
(15-20) - 25pp (Line)
(10-15) - 32nd (Line)
(15-20) - 33rd Line Company (Line)
(10-15) - VG_Gre (Line)
Total: (70 - 100) | (10-15) - 16th Cavalry Troop (Cavalry)
(10-15) - 92nd Light Company (Lights)
(20-25) - 16th Line Company (Line)
(20-25) - 45th (Line)
(10-15) - 92nd Line company (Line)
(5-10) - k.k. PK (Line)
Total: (75 - 105) |
Spoiler LightsAdmin Controlled Battle - both teams form up at spawn in two ranks facing the enemy. Each team will then face outwards and 'extend' the line from the centre (front rank and rear rank men staying together as pairs), until each pair is roughly 5 paces apart (this will should cover almost the entire map width). When ordered to advance move forward until resistance is met, advancing or retreating as need be. Try to keep your teams skirmish line together and get your members to work in skirmish pairs.With Ney's division saved by the arrival of Marshal Lannes, Napoelon consolidates his position in the centre once again. The Prussians, outnumbered on the field more and more with every hour passing, form a defensive line across the plain and await attack. In the meantime both sides send out skirmishers across the line to harass the enemy... Prussia/Saxony | France | (35-50) - 33rd (Lights)
(15-20) - 25pp (Lights)
(10-15) - 32nd (Lights)
(10-15) - VG_Gre (Lights)
Total: (70 - 100) | (30-40) - 16th (Lights)
(20-30) - 92nd (Lights)
(20-25) - 45th (Lights)
(5-10) - k.k. PK (Lights)
Total: (75 - 105) |
(1807) - Battle of Eylau
In late 1806 The Grande armee settled in for winter quarters in occupied Poland, after dealing a severe blow to the Prussian forces at Jena/Auerstadt. The new Campaign in 1807 however began early in January, with the Russians under Bennigsen attempting to turn the French left wing; after some manoeuvring however the multitude of French corps force the combined Prussian and Russian forces to withdraw to the North East. In early February with all his forces finally concentrated, Benngisen decides to make a stand at the town of Eylau. Napoleon confidently pursues on all fronts, with his army corps spread out - potentially too far to support each other. This later develops into the ultimate decider for one of the most bloodiest of battles of the Napoleonic Wars.
Please note that this Event will be replacing our Wednesday Conquest Event for this date only, our usual Conquest will continue to take place after this date.
Flag-spawning Stage 1 | Augerau's Offensive Classes - Line, CavalryFlag-Spawning Battle round - Teams win by reducing enemy tickets to 0.On the morning of the 8th both armies draw themselves up to give battle on opposite ridges, the town of Eylau under French occupation in the centre. The French army is in a vulnerable position, with two of its corps yet to make an appearance on the field and the allies having the numerical advantage. Napoleon regardless seizes the initiative and orders Augerau’s corps out of Eylau to attack the Russian centre, hoping to occupy the enemy long enough for Davout’s corps to arrive on the field. A storm which would be present most of the day shrouds the Russians as the French march blindly towards their positions...Allies | France | 10 | 24th (Hussars)
10 | 1BIR (Line Militia)
10 | 1stEB (Simbersky)
20 | LG (Pavlovsky)
10 | 4eMG (Footguard)
10 | HLI (Dragoons)
Total: (70) | 10 | 33rd (Hussars)
15 | [CEL]1er (45e)
10 | [AF]1er (84e)
15 | 33rd (Legion)
15 | 115e (Footguard)
00 | SPACE (15e)
00 | SPACE (Dragoons)
Total: (65) |
Stage 2 | Last Stand of the 14eme Classes - Line, CavalryFlag-Spawning round, Objective based - reduce enemy tickets to 0 like usual but France must defend the church yardBlinded by the snow storm, the various division of Augerau’s corps become scattered as they encounter the Russians, many falling back to Eylau before the onslaught of Russian artillery and musketry. One Regiment, the 14th Line stand firm bravely but as regiments either side begin to retreat the 14th find themselves surrounded. To protect themselves as best they can the infantry forms square and prepare to fight to the last man – the 14eme do not Surrender...Allies | France | 10 | 33rd (Hussars)
00 | SPACE (Cuirassiers)
10 | 1BIR (Line Militia)
10 | 1stEB (Simbersky)
20 | LG (Pavlovsky)
10 | 24th (Footguard)
10 | HLI (Dragoons)
Total: (70) | 15 | [CEL]1er (45e)
10 | [AF]1er (84e)
15 | 33rd (Legion)
15 | 115e (Footguard)
00 | SPACE (15e)
00 | SPACE (Dragoons)
Total: (55) |
Stage 3 | Attack on Eylau Classes - Line, CavalryFlag-Spawning Siege round - Teams win by reducing enemy tickets to 0 like usual but on a fortified map, each team should try and secure key defenses from which to have an advantage over their opposition. FiC and RiC permitted. Each regiment can have 1 sapper.With Augerau’s attack stalled his men are thrown back with heavy casualties, retreating to Eylau. The Russians under Bennigsen waste no time in taking advantage of the situation and launch a counter attack against the frail French center sheltering at Eylau. Napoleon historically commits his Old Guard to hold the town at all costs... Allies | France | 00 | SPACE (Hussars)
10 | 1BIR (Line Militia)
10 | 1stEB (Simbersky)
20 | LG (Pavlovsky)
10 | 24th (Footguard)
10 | HLI (Dragoons)
Total: (60) | 10 | 33rd (Hussars)
15 | [CEL]1er (45e)
10 | [AF]1er (84e)
15 | 33rd (Legion)
15 | 115e (Footguard)
00 | SPACE (15e)
00 | SPACE (Dragoons)
Total: (65) |
Stage 4 | Murat's Cavalry Charge Classes - Line, CavarlyAdmin controlled Normal Battle round, Russia form 2 ranks along the road and France await direction by an admin.With the French centre now as frail as ever and Ney’s corps not yet arrived, the situation for Napoleon looks dire indeed. It is at this point that a fresh Prussian corps now arrives on the field to support the Russian troops, leaving the fate of the battle in little doubt. However Napoleon now famously commits his final reserve; 11,000 cavalry under Marshal Murat to hammer the allied centre hard and buy him time for Ney and Davout’s corps to deploy on the field. Will the best cavalry France has to offer, seated on the best steeds in Europe be enough to stall the overwhelming allied forces...Allies | France | 10 | 1BIR (Line)
10 | 1stEB (Line)
20 | LG (Line)
10 | 24th (Line)
10 | HLI (Line)
15 | 33rd (Line)
Total: (75) | 10 | 33rd (Cavalry)
15 | [CEL]1er (Cavalry)
10 | [AF]1er (Cavalry)
15 | 115e (Cavalry)
Total: (55) |
Event Stages:Stage 1 | Struggle for Eylau | Siege Classes - Lines, Lights, CavalryNormal Siege, Cavalry class occupants may take line if they wish.On the 7th of February with the arrival of Augerau's corps, French troops outside the town of Eylau now have the strength to press the Russian rear-guard as it covers the main Russian armies retreat to high ground. The engagement quickly escalates into a bitter struggle for the town and the shelter it will offer the victor against the cold night closing in. The action continues into the night, the Russians making the French troops pay dearly for every building and street...Allies | France | 10 | 45th (Cavalry)
10 | BC (Lights)
10 | 1stEB (Line)
10 | 3e (Line)
15 | 16th (Line)
15 | 18pp (Line)
15 | Nr21 (Line)
25 | 45th (Line)
Total: (110) | 10 | 33rd (Cavalry)
10 | 92nd (Lights)
10 | 1er (Line)
10 | 4pw (Line)
20 | 25pp (Line)
20 | 33rd (Line)
15 | 73e (Line)
15 | 92nd (Line)
Total: (110) |
Stage 2 | Augerau's Offensive | Battle Classes - LineAdmin Controlled Battle - Both teams form 2 ranks on the admins and await direction.On the morning of the 8th both armies draw themselves up to give battle on opposite ridges, Eylau still under French occupation in the centre. The French army is in a vulnerable position, with two of its corps yet to make an appearance on the field and the allies having the numerical advantage. Napoleon regardless seizes the initiative and orders Augerau’s corps out of Eylau to attack the Russian centre, hoping to occupy the enemy long enough for Davout’s corps to arrive on the field. A storm which would be present most of the day shrouds the Russians as the French march blindly towards their positions...Allies | France | 10 | BC (Line)
10 | 1stEB (Line)
10 | 3e (Line)
15 | 16th (Line)
15 | 18pp (Line)
15 | Nr21 (Line)
35 | 45th (Line)
Total: (110) | 10 | 1er (Line)
10 | 4pw (Line)
20 | 25pp (Line)
30 | 33rd (Line)
15 | 73e (Line)
25 | 92nd (Line)
Total: (110) |
Stage 3 | Augerau's Offensive | Battle Classes - Lines, Lights, CavalryNormal BattleA confused combat ensues amidst the snow storm as Augerau's corp advances...Allies | France | 10 | 45th (Cavalry)
10 | BC (Lights)
10 | 1stEB (Line)
10 | 3e (Line)
15 | 16th (Line)
15 | 18pp (Line)
15 | Nr21 (Line)
25 | 45th (Line)
Total: (110) | 10 | 33rd (Cavalry)
10 | 92nd (Lights)
10 | 1er (Line)
10 | 4pw (Line)
20 | 25pp (Line)
20 | 33rd (Line)
15 | 73e (Line)
15 | 92nd (Line)
Total: (110) |
Stage 4 | Last Stand of the 14eme | Siege Classes - Lines, CavalryNormal Siege except the defenders must maintain formations to reload. France should use the surrounding terrain around the flag to defend - teamwork and forming square advisable!Blinded by the snow storm, the various division of Augerau’s corps become scattered as they encounter the Russians, many falling back to Eylau before the onslaught of Russian artillery and musketry. One Regiment, the 14th Line stand firm bravely but as regiments either side begin to retreat the 14th find themselves surrounded. To protect themselves as best they can the infantry forms square and prepare to fight to the last man – the 14eme do not Surrender...Allies | France | 10 | BC (Cavalry)
10 | 1stEB (Cavalry)
10 | 3e (Cavalry)
15 | Nr21 (Cavalry)
35 | 45th (Cavalry)
Total: (80) | 10 | 1er (Line)
10 | 4pw (Line)
15 | 16th (Line)
15 | 18pp (Line)
20 | 25pp (Line)
30 | 33rd (Line)
15 | 73e (Line)
25 | 92nd (Line)
Total: (140) |
Stage 5 | Bennigsen's counter offensive | Siege Classes - Lines, Lights, CavalryNormal Siege, Cavalry class occupants may take line if they wish.With Augerau’s attack stalled his men are thrown back with heavy casualties, retreating to Eylau. The Russians under Bennigsen waste no time in taking advantage of the situation and launch a counter attack against the frail French center sheltering at Eylau. Napoleon historically commits his Old Guard to hold the town at all costs... Allies | France | 10 | 45th (Cavalry)
10 | BC (Lights)
10 | 1stEB (Line)
10 | 3e (Line)
15 | 16th (Line)
15 | 18pp (Line)
15 | Nr21 (Line)
25 | 45th (Line)
Total: (110) | 10 | 33rd (Cavalry)
10 | 92nd (Lights)
10 | 1er (Line)
10 | 4pw (Line)
20 | 25pp (Line)
20 | 33rd (Line)
15 | 73e (Line)
15 | 92nd (Line)
Total: (110) |
Stage 6 | Murat's cavalry charge | Battle Classes - Lines, CavalryAdmin controlled round, Russia form 2 ranks along the road and France await direction by an admin.With the French centre now as frail as ever and Ney’s corps not yet arrived, the situation for Napoleon looks dire indeed. It is at this point that a fresh Prussian corps now arrives on the field to support the Russian troops, leaving the fate of the battle in little doubt. However Napoleon now famously commits his final reserve; 11,000 cavalry under Marshal Murat to hammer the allied centre hard and buy him time for Ney and Davout’s corps to deploy on the field. Will the best cavalry France has to offer, seated on the best steeds in Europe be enough to stall the overwhelming allied forces...Allies | France | 10 | BC (Line)
10 | 1stEB (Line)
10 | 3e (Line)
15 | 16th (Line)
15 | 18pp (Line)
15 | Nr21 (Line)
35 | 45th (Line)
25 | 92nd (Line)
Total: (135) | 10 | 1er (Cavalry)
10 | 4pw (Cavalry)
20 | 25pp (Cavalry)
20 | 33rd (Cavalry)
15 | 73e (Cavalry)
Total: (85) |
(1807) - Battle of Friedland (1807) - Battle of Friedland
06/11/2019
Teams Updated!Having fought eachother to a stalemate at Eylau, both the Allied and French armies spend the next few months attempting to out manouver one another, the campaign dragging on into early summer. On 13th June however Bennigsen's main russian force on its way north to regroup with their Prussian counterparts, encounters a single isolated French corps under Marshal Lannes. This could be the oppurtunity the Russians have been waiting for; a chance to knock-out 16,000 men from Napoleons Grand Armee, to even the odds when Bennigsen is forced to once again face the French Emperor in the field. Engaging the corps could prove extremely risky, the Russians having to cross a river which should they be engaged more heavily may prove their downfall... Event Stages:Stage 1 | Marshal Lannes' Delaying action | Admin Classes - Line, LightsAdmin controlled battle; both teams lines form up together in spawn facing the river. Lights of both team skirmish forward to the middle of the map. When the Russians advance the French lights will fire and retreat, eventually all lights reforming on their respective lines.Having committed to engaging the French corps on the other side of the river Lava, the Russians construct pontoon bridges and make their crossing late in the day of the 13th June. Marshal Lannes outnumbered almost 3 to 1 fights a delaying action from the towns of Friedland to Posthenen, using his light infantry to screen his movements and harass the advancing Russians...Russia | France | 10 | BC (Light)
10 | 4pw (Light)
15 | 16th (Line)
20 | 25pp (Line)
30 | 33rd (Light)
15 | LG (Line)
Total: (100) | 10 | 92nd (Light)
10 | 1er (Line)
10 | 1stEB (Line)
10 | 3e (Line)
15 | 18pp (Line)
15 | Nr21 (Line)
35 | 45th (Line)
15 | 92nd (Line)
Total: (120) |
Stage 2 | Bennigsen's Offensive on Heinrichsdorf | Battle Classes - Line, Lights, CavalryNormal BattleAs night falls on the 13th the French corps has successfully avoided destruction as it retreats to a safe distance. Unfortunately for Bennigsen's russians, two further French corps under Oudinot and Grouchy arrive during the night, ready to lend their weight to the battle soon to commence on 14th June. At dawn Russian troops attempt a push to the north, encountering Grouchy's forces on the outskirts of the village of Heirichsdorf. A fierce struggle soon ensues, both sides committing additional cavalry to the fray...Russia | France | 10 | 33rd (Cavalry)
10 | BC (Light)
10 | 1stEB (Line)
10 | 4pw (Line)
15 | 16th (Line)
20 | 25pp (Line)
20 | 33rd (Line)
15 | LG (Line)
Total: (110) | 10 | 45th (Cavalry)
10 | 92nd (Light)
10 | 1er (Line)
10 | 3e (Line)
15 | 18pp (Line)
15 | Nr21 (Line)
25 | 45th (Line)
15 | 92nd (Line)
Total: (110) |
Stage 3 | Bagration's Offensive on Sortlack wood | Siege Classes - Lines, Lights, CavalryNormal SiegeThe second part of the Russian offensive falls on French positions to the south on the opposite side of the battlefield, with Prince Bagration attacking Sortlack wood in force. General Oudinot though outnumbered, defends the treeline with an elite grenadier divison, having lightly fortified the position during the night...Russia | France | 10 | 33rd (Cavalry)
10 | BC (Light)
10 | 1stEB (Line)
10 | 4pw (Line)
15 | 16th (Line)
20 | 25pp (Line)
20 | 33rd (Line)
15 | LG (Line)
Total: (110) | 10 | 45th (Cavalry)
10 | 92nd (Light)
10 | 1er (Line)
10 | 3e (Line)
15 | 18pp (Line)
15 | Nr21 (Line)
25 | 45th (Line)
15 | 92nd (Line)
Total: (110) |
Stage 4 | Ney's Counter-attack | Battle Classes - Lines, Lights, CavalryNormal BattleAfter a bitter struggle for Sortlack wood the French troops are eventually forced to relinquish the position. The arrival of further reinforcment under Marshal Ney at Midday however enables the French to execute a swift counter attack to re-take the position... Russia | France | 10 | 33rd (Cavalry)
10 | BC (Light)
10 | 1stEB (Line)
10 | 4pw (Line)
15 | 16th (Line)
20 | 25pp (Line)
20 | 33rd (Line)
15 | LG (Line)
Total: (110) | 10 | 45th (Cavalry)
10 | 92nd (Light)
10 | 1er (Line)
10 | 3e (Line)
15 | 18pp (Line)
15 | Nr21 (Line)
25 | 45th (Line)
15 | 92nd (Line)
Total: (110) |
Stage 5 | The Retreat | Battle Classes - Lines, Lights, CavalryNormal BattleBy mid-afternoon the situation for the Russians turns sour as additional French corps arrive on the field, the Emperor himself amongst them. In the matter of just a few hours the Russian army find itself outnumbered on all fronts, with the river Lava to their backs. Acknowleging the immediate danger, Bennigsen orders a gradual retreat back through Friedland and across the pontoon bridges, slowly pulling back his line of defence. Napoleon wastes no time in ordering an all-out offensive on every inch of the Russian position. With lightning speed the resolve of the Russian troops begins to waver as the well-ordered retreat begins to turn into a rout. With Friedland set ablaze by canon fire, the Russian imperial guard maintain a rear-guard, delaying the French onslaught and attempting to ensure their armies survival...Russia | France | 10 | 33rd (Cavalry)
10 | BC (Light)
10 | 1stEB (Line)
10 | 4pw (Line)
15 | 16th (Line)
20 | 25pp (Line)
20 | 33rd (Line)
15 | LG (Line)
Total: (110) | 10 | 45th (Cavalry)
10 | 92nd (Light)
10 | 1er (Line)
10 | 3e (Line)
15 | 18pp (Line)
15 | Nr21 (Line)
25 | 45th (Line)
15 | 92nd (Line)
Total: (110) |
(1808) - Battle of Bailen UNDER CONSTRUCTION (1808) - Retreat to Coruna
Sir John Moore assumed command of the British Army in October 1808 and led it across Portugal and Spain, to link up with his Spanish allies to commence a campaign against his better wishes. At much the same time Napoleon arrived in the Peninsula at the head of 125,000 battle hardened veterans. Having restored his brother back on the Spanish throne, Napoleon turns his attention to remove Moore’s army. With his lines of communication compromised, Moore is forced to retreat in the dead of winter over the inhospitable Galician mountains, his army fighting tenacious rear-guard actions to facilitate their escape to Coruna where they finally turn to face the French. Event Stages:Flag-spawning Stage 1 | Cavalry Skirmish at Benavente Classes - CavalryNormal Battle, Admin Controlled to start.Early on in the Campaign it becomes apparent that retreat for the British Army is inevitable, with the huge amount of forces arrayed against them. Before resigning himself to the retreat however, Moore attempts a premptive strike against Soult's isolated corps to the north - reconaissance troops of these forces clashing at Sahagún. Despite a British victory Moore discovers Napoleon closing in so retreats towards the coast via Benavente. A sizeable French cavalry division of 3 squadrons crosses the river Elsa and threatens Lord Paget's rear-guard...Britain | France | 10 | 1BIR (Hussars)
25 | 33rd (Hussars)
10 | 1stEB (Hussars)
10 | HLI (Hussars)
10 | 1tes (Hussars)
10 | 56e (Hussars)
Total: (75) | 10 | 17e (Hussars)
20 | LG (Hussars)
15 | 18pp (Hussars)
20 | 45th (Hussars)
10 | 40th (Hussars)
00 | SPACE (Hussars)
Total: (75) |
Stage 2 | Action at Benavente Classes - Lines, CavalryNormal Flag-Spawning round - reduce enemy tickets to 0.Following the cavalry skirmish Infantry engage for a short time, to secure the escape of the rest of Moore's army...Britain | France | 10 | 33rd (Hussars)
10 | 1BIR (33rd)
15 | 33rd (KGL)
10 | 1stEB (42nd)
10 | HLI (Footguard)
10 | 1tes (dragoons)
10 | 56e (Royal blues)
Total: (75) | 10 | 45th (Hussars)
10 | 17e (45e)
20 | LG (84e)
15 | 18pp (Legion)
10 | 45th (Footguard)
10 | 40th (Dragoons)
00 | SPACE (Cuirassiers)
Total: (75) |
Stage 3 | Retreat through the Mountains Classes - Lines, CavalryObjective Flag-Spawning round - UK must reach the end of the road to achieve victory, France harrass the Infantry and capture flags to reduce their tickets to 0 first.As the retreat drags on in the treacherous, mountainous terrain, the army is beset by continuous French cavalry attacks; with the relative safety of the bridge at Cacabelos within sight, the British must hold out until they reach safety...Britain | France | 10 | 1BIR (33rd)
15 | 33rd (KGL)
10 | 1stEB (42nd)
10 | HLI (Footguard)
20 | LG (51st)
10 | 1tes (dragoons)
10 | 56e (Royal blues)
Total: (85) | 20 | 45th (Hussars)
10 | 33rd (Hussars)
10 | 17e (Carabiniers)
15 | 18pp (Carabiniers)
10 | 40th (Guard Cavalry)
00 | SPACE (Guard Cavalry)
Total: (65) |
Stage 4 | Rear-guard at Cacabelos Classes - LineFlag-Spawning Siege round - reduce enemy tickets to 0 like usual but on a fortified map, FiC and RiC permitted.Moore's weary army crosses the bridge at Cacabelos, a strong defensive position from which to hold back Soult's advance. General Crawford's light division must hold the crossing, buying Moore time to retreat on to Lugo and from there to Coruna...Britain | France | 10 | 1BIR (33rd)
25 | 33rd (KGL)
10 | 1stEB (42nd)
10 | HLI (Footguard)
10 | 1tes (dragoons)
10 | 56e (Royal blues)
Total: (75) | 10 | 17e (45e)
20 | LG (84e)
15 | 18pp (Legion)
20 | 45th (Footguard)
10 | 40th (Dragoons)
00 | SPACE (Cuirassiers)
Total: (75) |
Spoiler CavalryAdmin Controlled Battle: Both teams form up on the admin at spawn and await direction.Early on in the Campaign it becomes apparent that retreat for the British Army is inevitable, with the huge amount of forces arrayed against them. Before resigning himself to the retreat however, Moore attempts a premptive strike against Soult's isolated corps to the north - reconaissance troops of these forces clashing at Sahagún... Britain | France | (10-15) - 33rd Cavalry Troop (Hussars)
(10-15) - 92nd Light coy (Hussars)
(10-15) - Nr19 (Hussars)
(15-20) - 25pp (Hussars)
(10-15) - 32nd (Hussars)
(15-20) - 33rd Line coy (Hussars)
(10-15) - 92nd Line coy (Hussars)
Total: (80 - 115) | (10-15) - 16th Cavalry Troop (Dragoons)
(10-15) - k.k. PK (Dragoons)
(20-25) - 16th Line coy (Dragoons)
(15-20) - Nr21 (Dragoons)
(20-25) - 45th (Dragoons)
(10-15) - VG_Gre (Dragoons)
Total: (85 - 115) |
Stage 1 | Cavalry Skirmish at Benavente | Battle Classes - CavalryNormal Siege, Cavalry class occupants may take line if they wish.Early on in the Campaign it becomes apparent that retreat for the British Army is inevitable, with the huge amount of forces arrayed against them. Before resigning himself to the retreat however, Moore attempts a premptive strike against Soult's isolated corps to the north - reconaissance troops of these forces clashing at Sahagún. Despite a British victory Moore discovers Napoleon closing so retreats towards the coast via Benavente. A sizeable French cavalry division of 3 squadrons crosses the river Elsa and threatens Lord Paget's rear-guard...Britain | France | 10 | 1stEB (Cavalry)
10 | 4pw (Cavalry)
15 | 18pp (Cavalry)
20 | 25pp (Cavalry)
30 | 33rd (Cavalry)
25 | 92nd (Cavalry)
Total: (110) | 10 | BC (Cavalry)
10 | 1er (Cavalry)
10 | 3e (Cavalry)
15 | 16th (Cavalry)
15 | Nr21 (Cavalry)
35 | 45th (Cavalry)
15 | 73e (Cavalry)
Total: (110) |
Stage 2 | Action at Benavente | Battle Classes - Line, Lights, CavalryNormal BattleFollowing the cavalry skirmish Infantry engage for a short time, to secure the escape of the rest of Moore's army...Britain | France | 10 | 33rd (Cavalry)
10 | 92nd (Light)
10 | 1stEB (Line)
10 | 4pw (Line)
15 | 18pp (Line)
20 | 25pp (Line)
20 | 33rd (Line)
15 | 92nd (Line)
Total: (110) | 10 | 45th (Cavalry)
10 | BC (Light)
10 | 1er (Line)
10 | 3e (Line)
15 | 16th (Line)
15 | Nr21 (Line)
25 | 45th (Line)
15 | 73e (Line)
Total: (110) |
Stage 3 | Retreat through the Mountains | Battle Classes - Lines, Lights, CavalryNormal BattleThe British retreat across northern Spain is slow in the extreme winter weather, with Soults corps hard on their heels...Britain | France | 10 | 33rd (Cavalry)
10 | 92nd (Light)
10 | 1stEB (Line)
10 | 4pw (Line)
15 | 18pp (Line)
20 | 25pp (Line)
20 | 33rd (Line)
15 | 92nd (Line)
Total: (110) | 10 | 45th (Cavalry)
10 | BC (Light)
10 | 1er (Line)
10 | 3e (Line)
15 | 16th (Line)
15 | Nr21 (Line)
25 | 45th (Line)
15 | 73e (Line)
Total: (110) |
Stage 4 | Retreat through the Mountains | Escort Classes - Lines, CavalryDefenders spawn 3x Arty horses (see teams) and must bring at least one to the end of the road to win the round. Absolutely NO projectile weapons permitted on France.As the retreat drags on in the treacherous, mountainous terrain, the army is beset by continuous French cavalry attacks; with the relative safety of the bridge at Cacabelos within sight, the British must protect their supply trains if they mean to survive all the way to the coast...Britain | France | 10 | 33rd (Cavalry)
10 | 1stEB (Line)
10 | 1er (Line)
10 | 4pw (Line)
15 | 18pp (Line)
15 | Nr21 (Line)
20 | 25pp (Line + Arty Train)
20 | 33rd (Line + Arty Train)
25 | 92nd (Line + Arty Train)
Total: (135) | 10 | 45th (Cavalry)
10 | BC (Cavalry)
10 | 3e (Cavalry)
15 | 16th (Cavalry)
35 | 45th (Cavalry)
15 | 73e (Cavalry)
Total: (85) |
Stage 5 | Rear-guard at Cacabelos | Siege Classes - Lines, Lights, CavalryNormal Siege, Cavalry may take Infantry if they wishMoore's weary army crosses the bridge at Cacabelos, a strong defensive position from which to hold back Soult's advance. General Crawford's light division must hold the crossing, buying Moore time to retreat on to Lugo and from there to Coruna...Britain | France | 10 | 33rd (Cavalry)
10 | 92nd (Light)
10 | 1stEB (Line)
10 | 4pw (Line)
15 | 18pp (Line)
20 | 25pp (Line)
20 | 33rd (Line)
15 | 92nd (Line)
Total: (110) | 10 | 45th (Cavalry)
10 | BC (Light)
10 | 1er (Line)
10 | 3e (Line)
15 | 16th (Line)
15 | Nr21 (Line)
25 | 45th (Line)
15 | 73e (Line)
Total: (110) |
(1809) - Battle of Coruna Sir John Moore is on the last leg of his retreat through Northern Spain to La Coruna in apalling Winter conditions; discpline in his ravaged army hangs by a thread as they press on to the coastal port and hopefully rescue by the Royal Navy. Marshal Soult is hard on his heels, chasing down stragglers as they break free of the mountains. Moore turns to face him at Coruna to buy time to extricate his army to fight another day... Stage 1 | Pursuit at Bentazos Classes - Line, CavalryFlag-Spawning round - UK reach the goal at the end of the road or reduce enemy tickets to 0. France prevent UK from reaching the goal in 10mins or reduce enemy tickets to 0.Shortly after the delaying action at the bridge crossing of Cacabellos the British are able to escape the mountainous terrain, only a stones throw from the safety and supplies of Coruna. Unfortunately due to the prolonged arduous retreat, stragglers from the main force have grown to the thousands; they must band together as they make their way north to avoid sabres of the pursuning French cavalry... Allies | France | 10 | 1BIR (33rd)
10 | 1stEB (KGL)
20 | LG (42nd)
15 | 92nd (Footguard)
10 | Legion (51st)
10 | HLI (Dragoons)
00 | SPACE (Horseguards)
Total: (75) | 30 | 33rd (Hussars)
10 | 1er (Carabiniers)
10 | 18pp (Carabiniers)
15 | 115e (Grenadier A'Cheval)
10 | 17e (Grenadier A'Cheval)
Total: (75) |
Stage 2 | Coruna, Mermet's Offensive Classes - LineFlag-Spawning round, Admin controlled to start (see screenshot in groupchat) - a few mins in continue with normal Round.Moore's army reaches the safety of Coruna but the transports have not yet arrived. Within a few days the Navy begins to arrive but so does Soult's pursing force; Moore deploys his Infantry atop an opposing ridge but orders his artillery and cavalry to embark, not expecting an attack as the day draws on. Soult however chooses to attack at midday, ordering Mermet's division to attack the village of Elvina. The allied picket retreats but Moore rallies the 42nd and 50th foot to retake the key position...Allies | France | 10 | 1BIR (33rd)
10 | 1stEB (KGL)
20 | LG (42nd)
15 | 92nd (Footguard)
10 | Legion (51st)
10 | HLI (Dragoons)
00 | SPACE (Horseguards)
Total: (75) | 10 | 1er (45e)
30 | 33rd (84e)
10 | 18pp (Legion)
15 | 115e (Footguard)
10 | 17e (15e)
00 | SPACE (Dragoons)
00 | SPACE (Cuirassiers)
Total: (75) |
Stage 3 | Coruna, Paget's Skirmish Classes - SkirmishersBattle round, Admin controlled to start. Skirmisher rules apply to all units.Mermet's offensive in the centre starts to gain traction as they begin to encircle the position around the British right flank. Paget's Light division is brought from the reserve however to shore up the flank and face off against Lahoussaye's dragoons, having to fight on foot as skirmishers due to the dense woodland...Allies | France | 10 | 1BIR (95th)
10 | 1stEB (95th)
20 | LG (95th)
15 | 92nd (95th)
10 | Legion (95th)
10 | HLI (95th)
00 | SPACE (95th)
Total: (75) | 10 | 1er (Lancer)
30 | 33rd (Lancer)
10 | 18pp (Lancer)
15 | 115e (Lancer)
10 | 17e (Lancer)
00 | SPACE (Lancer)
00 | SPACE (Lancer)
Total: (75) |
Stage 4 | Coruna, holding the line Classes - Line, CavalryFlag-Spawning roundPaget drives of Lahoussaye's dragoons to shore up the British right but Mermet and DeLaborde's Infantry still hard press the centre supported by artillery. Steadfast discipline will be needed for the British Line to hold out until nightfall...Allies | France | 00 | SPACE (Hussars)
10 | 1BIR (33rd)
10 | 1stEB (KGL)
20 | LG (42nd)
15 | 92nd (Footguard)
10 | Legion (51st)
10 | HLI (Dragoons)
00 | SPACE (Horseguards)
Total: (75) | 10 | 33rd (Hussars)
10 | 1er (45e)
20 | 33rd (84e)
10 | 18pp (Legion)
15 | 115e (Footguard)
10 | 17e (15e)
00 | SPACE (Dragoons)
00 | SPACE (Cuirassiers)
Total: (75) |
(1809) - Battle of Aspern-Essling UNDER CONSTRUCTION
|  |
(1809) - Battle of Wagram UNDER CONSTRUCTION (1811) - Battle of Albuera While Wellington is engaged with Marshal Massena at Fuentes de Oñoro, Marshal Beresford lays siege to the fortified border city of Badajoz in the south, with support from Spanish General Blake. In early May 1811, Marshal Soult marches north from Seville with his Army of Andalusia, to relieve the French garrison at Badajoz. Beresford and Blake agree to confront Soult at Albuera, a defensive ridge position. Soult presses his march with all speed, intending to catch Beresford before he can concentrate his troops to oppose him. On 15th May 1811, Beresford issues his orders for the army to concentrate on the Albuera position, Spanish troops arriving on the morning of the 16th, just as Marshal Soult prepares his attack...
Event Stages: Stage 1 | Diversionary Attack Classes - Line, CavalryNormal Flag-Spawning Round - reduce enemy tickets to 0.Beresford places his army on the ridge, expecting to receive a frontal assault across the river and through the village of Albuera. Soult begins the Battle with a diversionary action across the bridges, engaging Alten's brigade on the morning of the 16th. Soult hopes to draw more troops to this sector, making way for his flanking attack to the south...Allies | France | 10 | 33rd (Hussars)
10 | 24th (33rd)
20 | LG (KGL)
10 | 92nd (42nd)
15 | 33rd (Footguard)
10 | TC (51st)
10 | 1BIR (Dragoons)
Total: (85) | 10 | 23rd (Hussars)
10 | 1er (45e)
20 | 23rd (84e)
10 | 1stEB (Legion)
15 | 115e (Footguard)
10 | HLI (15e)
10 | 4eMG (Dragoons)
Total: (85) |
Stage 2 | Spanish hold the Line Classes - LineAdmin Flag-Spawning Round - reduce enemy tickets to 0 like usual but with admin commands. All regiments take the same class and will spawn on a single flag bearer.By late morning the diversionary attack on Albuera is having the affect Soult intends, with Beresford drawing on his reserves to bolster the village. Generals Gazan and Girard's divisions now emerge from behind high ground to the south, outflanking the allied position across the river. General Zayas' spanish troops occupy the crucial high ground above the river alone, to hold the line until British troops can be re-positioned to support them...Allies | France | 10 | 24th (42nd)
20 | LG (42nd)
10 | 92nd (42nd)
25 | 33rd (42nd)
10 | TC (42nd)
10 | 1BIR (42nd)
Total: (85) | 10 | 1er (84e)
30 | 23rd (84e)
10 | 1stEB (84e)
15 | 115e (84e)
10 | HLI (84e)
10 | 4eMG (84e)
Total: (85) |
Stage 3 | 2nd Division advance Classes - Lines, CavalryAdmin Battle Round - Normal Battle but follow admin commands.Zayas' Spaniards hold their ground well, stalling the French column attack and trading volleys for an hour and a half. 2nd Division having arrived to support rush eagerly to take advantage of the stalemate, even as rain begins to fall preventing the troops from firing effectively. Colborne wheels from the right flank to enfilade the French attack, unaware of the large French cavalry precence hidden in dead ground to the south...Allies | France | 10 | 24th (33rd)
20 | LG (33rd)
10 | 92nd (33rd)
15 | 33rd (33rd)
10 | TC (33rd)
10 | 1BIR (33rd)
10 | HLI (33rd)
10 | 4eMG (33rd)
Total: (95) | 30 | 23rd (Hussars)
10 | 1er (Hussars)
10 | 1stEB (Hussars)
15 | 115e (Hussars)
10 | 33rd (Hussars)
Total: (75) |
Stage 4 | Cole's Attack Classes - Lines, LightsNormal Flag-Spawning Round - reduce enemy tickets to 0.Colborne's Brigade is all but destoryed by cavalry, losing 5 standards. The Spanish divisions atop the heights also begin to break and run. Fortunately for the Allies more British divisions gradually arrive from the centre to shore up the line. The resulting exchange of fire lasts for hours with neither side giving an inch, inflicting awful casualties upon both sides. At this crucial point in the battle Cole arrives with his division from the road to Badajoz, sending his mix of British and Portuguese troops against the French left. Will this be enough to break the stalemate and drive the Soult's army from the field... Allies | France | 10 | 33rd (Hussars)
10 | 24th (33rd)
20 | LG (KGL)
10 | 92nd (42nd)
15 | 33rd (Footguard)
10 | TC (51st)
10 | 1BIR (Dragoons)
Total: (85) | 10 | 23rd (Hussars)
10 | 1er (45e)
20 | 23rd (84e)
10 | 1stEB (Legion)
15 | 115e (Footguard)
10 | HLI (15e)
10 | 4eMG (Dragoons)
Total: (85) |
Battle in the Morning...
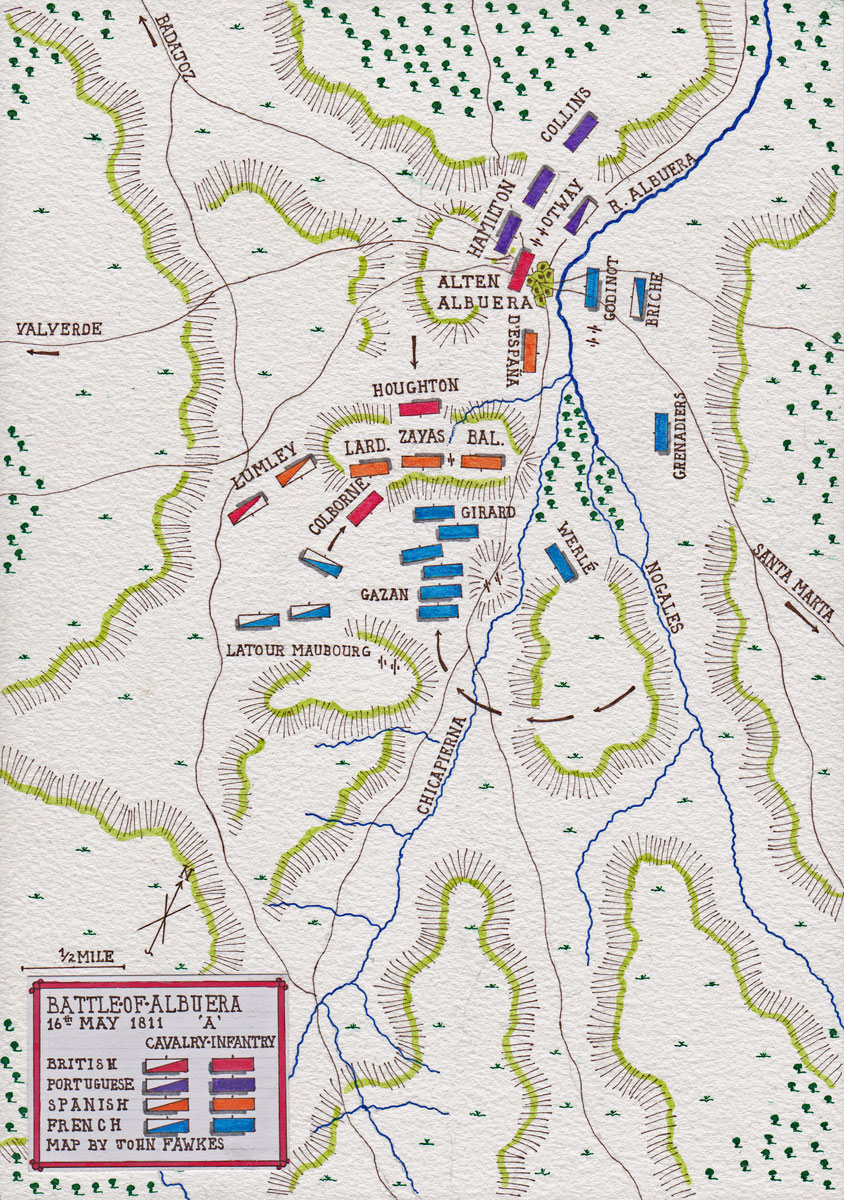 | Battle after midday...
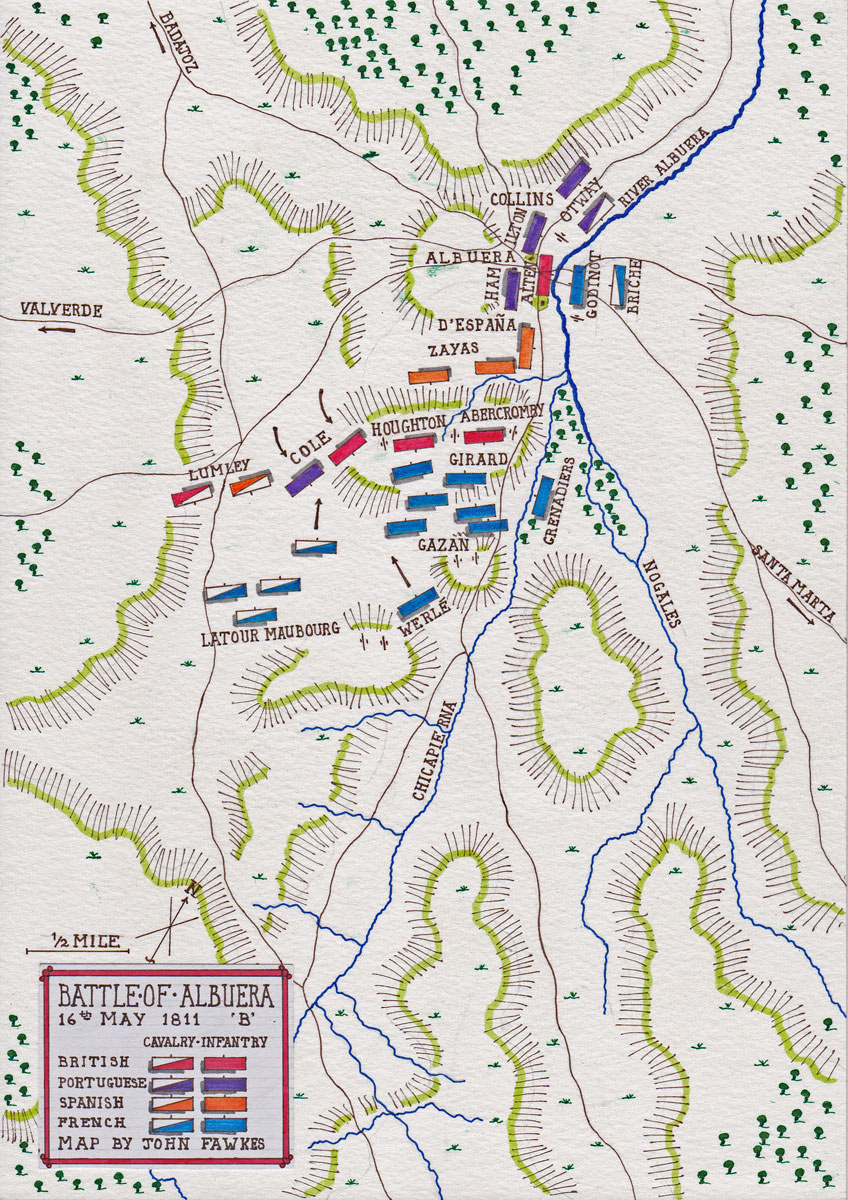 |
(1809-1811) - Peninsular Campaign
Peninsular Campaign (1809-11)
06/02/2019It’s the summer of 1809 on the Portuguese border and the Anglo-Portuguese army under Sir Arthur Wellesley has just repelled a French invasion into Portugal by Marshal Soult. Hoping to take the initiative and potentially gain a swift victory, Wellesley advances into Spain at the head of 20,000 men. He hopes to link up with some 30,000 Spanish troops under General Cuesta, a combined force that may prove able to force its way through French Marshal Victor’s 46,000 and capture the Spanish capital of Madrid... flag-spawning Stage 1 | Talavera, night attack Classes - Line, CavalryNormal Flag-Spawning Round - reduce enemy tickets to 0.On the 27th July British, French and Spanish troops converge near the city of Talavera with only a small stream separating the allied and French positions. French divisional commander Ruffin seizes the initiative and attempts a daring night attack, to take a strategic hill on the left flank of the allied position. Ruffin’s gamble pays off, forcing some Kings German Legion troops off the heights. British divisional commander Hill quickly recognises the danger, swiftly moving to counter attack and re-take the heights…Allies | France | 10 | 33rd (Hussars)
15 | 33rd (33rd)
20 | LG (KGL)
10 | 42nd (42nd)
10 | 24th (Footguard)
15 | 92nd (Dragoons)
00 | SPACE (Heavy Dragoons)
Total: (80) | 10 | 23rd (Hussars)
10 | 1er (45e)
15 | 23rd (84e)
15 | 63rd (Legion)
15 | 1erFusGre (Footguard)
10 | HLI (Dragoons)
10 | BIR (Carabiniers)
Total: (85) |
Stage 2 | Talavera, French offensive Classes - Line, CavalryAdmin controlled to start, then Normal Flag-Spawning Round - reduce enemy tickets to 0.On the morning of the 28th the army’s positions become clear, the British having fought desperately to re-capture the heights the night before. Victor draws up the majority of his forces opposite the British on the allied left, considering this the most likely place to break their line. After an intense artillery barrage, the first French attack crosses the stream in mixed order, advancing on the allied position where the British await them...Allies | France | 10 | 33rd (Hussars)
15 | 33rd (33rd)
20 | LG (KGL)
10 | 42nd (42nd)
10 | 24th (Footguard)
15 | 92nd (Dragoons)
00 | SPACE (Heavy Dragoons)
Total: (80) | 10 | 23rd (Hussars)
10 | 1er (45e)
15 | 23rd (84e)
15 | 63rd (Legion)
15 | 1erFusGre (Footguard)
10 | HLI (Dragoons)
10 | BIR (Carabiniers)
Total: (85) |
Stage 3 | Fuentes de Onoro, Rescuing the 7th Division Classes - Lines, CavalryObjective Flag-Spawning Round, Infantry vs Cavalry; Infantry protect your flags (high cost for loss) and retreat to the village atop the hill. Cavalry capture as many flags as possible to reduce UK tickets to 0 before they reach safety.Talavera proved a phyrric victory for the allies, with heavy losses forcing the British to re-consider their position and withdraw back into Portugal, closely followed by Marshal Soult. Soult is expelled from Portugal a second time at the Lines of Torres Vedras, permitting a second allied offensive in 1811.
On his second attempt at success in Spain, Wellesley moves to capture the fortified city of Almeida. French Marshal Massena moves to relieve the garrison and encounters the British in a defensive position, centred around the village of Fuentes De Onoro. Most of the days battle is spent by the French attacking the village, however a large-scale flank engagement on the British right is almost disastrous; The Light Division narrowly rescues the battered 7th Division, exectuing a fighting retreat against thousands of French cavalry...Allies | France | 15 | 33rd (33rd)
20 | LG (KGL)
10 | 42nd (42nd)
10 | 24th (Footguard)
15 | 92nd (Dragoons)
15 | 63rd (Heavy Dragoons)
Total: (85) | 25 | 23rd (Hussars)
10 | 33rd (Hussars)
10 | 1er (Hussars)
15 | 1erFusGre (Cuirassiers)
10 | HLI (Cuirassiers)
10 | BIR (Cuirassiers)
Total: (80) |
Stage 4 | Fuentes de Onoro, holding the village Classes - LinesSiege Flag-Spawning Round (FiC & RiC permitted)Fuentes de'Onoro in the centre of the allied line has faced fierce infantry attacks all day and is close to breaking point. The village is merely a sprawling set of poor buildings, with high ground to the rear marked by a church. This must be held at all costs if the British are to win the day. The French ready themselves for one final attack, sensing that the battered defenders are close to breaking…Allies | France | 25 | 33rd (33rd)
20 | LG (KGL)
10 | 42nd (42nd)
10 | 24th (Footguard)
15 | 92nd (Dragoons)
00 | SPACE (Heavy Dragoons)
Total: (80) | 10 | 1er (45e)
25 | 23rd (84e)
15 | 63rd (Legion)
15 | 1erFusGre (Footguard)
10 | HLI (Dragoons)
10 | BIR (Carabiniers)
Total: (85) |
Event Stages:Stage 1 | Talavera, night attack | Battle Classes - Line, Lights, CavalryNormal BattleOn the 27th July British, French and Spanish troops converge near the city of Talavera with only a small stream separating the allied and French positions. French divisional commander Ruffin seizes the initiative and attempts a daring night attack, to take a strategic hill on the left flank of the allied position. Ruffin’s gamble pays off, forcing some Kings German Legion troops off the heights. British divisional commander Hill quickly recognises the danger, swiftly moving to counter attack and re-take the heights…Britain | France | 10 | 33rd (Cavalry)
10 | 92nd (Light)
15 | Nr21 (Line)
20 | 25pp (Line)
20 | 33rd (Line)
15 | 92nd (Line)
15 | LG (Line)
Total: (105) | 10 | 45th (Cavalry)
10 | BC (Light)
10 | 1er (Line)
10 | 1stEB (Line)
10 | 4pw (Line)
15 | 16th (Line)
15 | 18pp (Line)
25 | 45th (Line)
Total: (105) |
Stage 2 | Talavera, French offensive | Admin Classes - LineUK form up on the crest as directed, France form line facing the river, 3 ranks deep. Lights on each team form up with the line until you are permitted to skirmish forward and give fire.On the morning of the 28th the army’s positions become clear, the British having fought desperately to re-capture the heights the night before. Victor draws up the majority of his forces opposite the British on the allied left, considering this the most likely place to break their line. After an intense artillery barrage, the first French attack crosses the stream in mixed order, advancing on the allied position where the British wait in a two rank deep line...Britain | France | 10 | 92nd (Light)
15 | Nr21 (Line)
20 | 25pp (Line)
30 | 33rd (Line)
15 | 92nd (Line)
Total: (90) | 10 | BC (Light)
10 | 1er (Line)
10 | 1stEB (Line)
10 | 4pw (Line)
15 | 16th (Line)
15 | 18pp (Line)
35 | 45th (Line)
15 | LG (Line)
Total: (120) |
Stage 3 | Talavera, British counter-attack | Battle Classes - Lines, Lights, CavalryNormal Battlehe first French attacks are eventually beaten back, withdrawing back across the river. The British guards division eagerly pursues the enemy, recklessly leaving the defensive position of the ridge...Britain | France | 10 | 33rd (Cavalry)
10 | 92nd (Light)
15 | Nr21 (Line)
20 | 25pp (Line)
20 | 33rd (Line)
15 | 92nd (Line)
15 | LG (Line)
Total: (105) | 10 | 45th (Cavalry)
10 | BC (Light)
10 | 1er (Line)
10 | 1stEB (Line)
10 | 4pw (Line)
15 | 16th (Line)
15 | 18pp (Line)
25 | 45th (Line)
Total: (105) |
Stage 4 | Fuentes de Onoro, Rescuing the 7th Division | Escort Classes - Lines, CavalryDefenders spawn 3x Arty horses (see teams) and must collect the abandoned guns (in the middle of the map), bringing at least one to the ridge (marked with a siege flag) to win the round. Absolutely NO projectile weapons permitted on France.Talavera proved a phyrric victory for the allies, with heavy losses forcing the British to re-consider their position and withdraw back into Portugal, closely followed by Marshal Soult. Soult is expelled from Portugal a second time at the Lines of Torres Vedras, permitting a second allied offensive in 1811.
On his second attempt at success in Spain, Wellesley moves to capture the fortified city of Almeida. French Marshal Massena moves to relieve the garrison and encounters the British in a defensive position, centred around the village of Fuentes De Onoro. Most of the days battle is spent by the French attacking the village, however a large-scale flank engagement on the British right is almost disastrous; The Light Division narrowly rescues the battered 7th Division, but amidst the confusion a horse artillery battery is caught off guard and almost captured...Britain | France | 10 | 33rd (Cavalry)
10 | 92nd (Light)
15 | 16th (Line + Artillery Train)
15 | Nr21 (Line + Artillery Train)
20 | 25pp (Line)
20 | 33rd (Line)
15 | 92nd (Line + Artillery Train)
15 | LG (Line)
Total: (120) | 10 | 45th (Cavalry)
10 | BC (Cavalry)
10 | 1er (Cavalry)
10 | 1stEB (Cavalry)
10 | 4pw (Cavalry)
15 | 18pp (Cavalry)
25 | 45th (Cavalry)
Total: (90) |
Stage 5 | Fuentes de Onoro, holding the village | Siege Classes - Lines, LightsNormal SiegeFuentes de'Onoro in the centre of the allied line has faced fierce infantry attacks all day and is close to breaking point. The village is merely a sprawling set of poor buildings, with high ground to the rear marked by a church. This must be held at all costs if the British are to win the day. The French ready themselves for one final attack, sensing that the battered defenders are close to breaking…Britain | France | 10 | 92nd (Light)
15 | Nr21 (Line)
20 | 25pp (Line)
30 | 33rd (Line)
15 | 92nd (Line)
15 | LG (Line)
Total: (105) | 10 | BC (Light)
10 | 1er (Line)
10 | 1stEB (Line)
10 | 4pw (Line)
15 | 16th (Line)
15 | 18pp (Line)
35 | 45th (Line)
Total: (105) |
(1812) - War of 1812 The United States of America declared war on Britain 18th June 1812, leading to a confusing back and forth conflict that lasted three years... Event Stages: Stage 1 | Van Rensselaer's Push Classes - Lines, CavalryAdmin Controlled to start, then proceed with Normal Flag-Spawning - Both teams form up at spawn to await Admin direction. Reduce enemy tickets to 0.Having suffered numerous humiliating defeats at the hands of the British early into the Canadian Campaign, the war would come to its first major battle on the 13th October 1812; Major-General Van Rensselaer leads a sizable army of around 3,000 US militia, to face-off against Major-General Issac Brock's combined British and Mohawk force of just over 1000 men...UK | USA | 10 | 33rd (Hussars)
10 | 1BIR (33rd)
15 | 33rd (KGL)
15 | Nr59 (42nd)
10 | HLI (Footguard)
10 | Legion (51st)
10 | 13-ty (Dragoons)
10 | 40th (Royal blues)
Total: (90) | 10 | 45th (Hussars)
10 | 17e (45e)
20 | LG (84e)
15 | 18pp (Legion)
10 | 1stEB (Footguard)
00 | SPACE (15e)
15 | 115e (Dragoons)
10 | BIR (Cuirassiers)
Total: (90) |
Stage 2 | The St. Lawrence Campaign Classes - Lines, CavalryNormal Flag-Spawning round - reduce enemy tickets to 0.In an attempt to capture Montreal, the US launched the St. Lawrence Campaign into British & Canadian held territory. This would see its first engagement on the 11th November 1813 at the fields of Crysler's Farm. A severely outnumbered British-Canadian force of only 900 men would face General James Wilkinsons 8,000 strong US army...UK | USA | 10 | 33rd (Hussars)
10 | 1BIR (33rd)
15 | 33rd (KGL)
15 | Nr59 (42nd)
10 | HLI (Footguard)
10 | Legion (51st)
10 | 13-ty (Dragoons)
10 | 40th (Royal blues)
Total: (90) | 10 | 45th (Hussars)
10 | 17e (45e)
20 | LG (84e)
15 | 18pp (Legion)
10 | 1stEB (Footguard)
00 | SPACE (15e)
15 | 115e (Dragoons)
10 | BIR (Cuirassiers)
Total: (90) |
Stage 3 | British offensive at Chippawa Classes - Lines, CavalryNormal Flag-Spawning round - reduce enemy tickets to 0.In the wak of Napoleons defeat in Europe early 1814, Britain would now pull its complete military focus and more importantly, its veteran regiments to the Canadian frontier. The Chippawa river would be the first of Britains renewed offensives. Major General Riall, commanding a force of 2,000 British Regulars, makes his move on what he assumes to be a small force of US militia holding outposts across the river, but which soon are revealed to be an equal number of experienced US regulars under the command of American Major General Brown. This would set a new standard for land-engagements in the war, with ferocious fighting between both nations most capable soldiers...UK | USA | 10 | 33rd (Hussars)
10 | 1BIR (33rd)
15 | 33rd (KGL)
15 | Nr59 (42nd)
10 | HLI (Footguard)
10 | Legion (51st)
10 | 13-ty (Dragoons)
10 | 40th (Royal blues)
Total: (90) | 10 | 45th (Hussars)
10 | 17e (45e)
20 | LG (84e)
15 | 18pp (Legion)
10 | 1stEB (Footguard)
00 | SPACE (15e)
15 | 115e (Dragoons)
10 | BIR (Cuirassiers)
Total: (90) |
Stage 4 | Battle of Baltimore Classes - Line, ArtilleryAdmin Controlled to start, then proceed with Flag-Spawning Siege - Both teams form up at spawn to await Admin direction. Reduce enemy tickets to 0 like usual but on a siege-like map, FiC & RiC permitted. Each Regiment may take 1 Sapper & 2 ArtillerymenShortly following the burning of the White House, Major-General Robert Ross attempts an amphibious landing on the port city of Baltimore. However, despite heavy naval bombardment by the British Fleet, US defenders under the command of General Samuel Smith put up a stubborn and valiant defence.UK | USA | 10 | 1BIR (33rd)
15 | 33rd (KGL)
15 | Nr59 (42nd)
10 | HLI (Footguard)
10 | Legion (51st)
10 | 13-ty (Dragoons)
10 | 40th (Royal blues)
Total: (90) | 10 | 17e (45e)
20 | LG (84e)
15 | 18pp (Legion)
10 | 1stEB (Footguard)
00 | SPACE (15e)
15 | 115e (Dragoons)
10 | BIR (Cuirassiers)
10 | 45th (need to share!)
Total: (90) |
(1812) - Peninsular Campaign
Peninsular Campaign (1812)
20/02/2019
With the turn of the new year in January 1812, Sir Arthur Wellesley and his Anglo-Portuguese army turn their attention to capturing the keys to Spain; These fortified cities of Cuidad Rodrigo and Badajoz must be captured to remove the thread of a renewed invasion of Portugal. With or without the capture of these fortresses, there are still sizeable French army corps mustering in Spain which will need to be engaged with care. Will this years campaign see an end to French interests in Portugal or even Spain itself? Event Stages:Flag-spawning Stage 1 | Cuidad Rodrigo Classes - Line, ArtilleryFlag-Spawning Siege round - Teams win by reducing enemy tickets to 0 like usual but on a fortified map, each team should try and secure key defenses from which to have an advantage over their opposition. FiC and RiC permitted. Each regiment can have 1 sapper and 1 artilleryman.The first key to Spain comes in the form of the fortified city of Cuidad Rodrigo. With fresh French corps regrouping in Spain a drawn out siege will not be practicable; The Fort must be taken by storm, whatever the cost. When night falls a small 'Forlorn hope' assembles in the trenches near the breach, in an attempt to surprise the defenders...Allies | France | 25 | 23rd (33rd)
20 | LG (KGL)
10 | 92nd (42nd)
10 | 24th (Footguard)
10 | BIR (51st)
10 | Nr21 (Dragoons)
Total: (85) | 10 | 1er (45e)
25 | 33rd (84e)
10 | HLI (Legion)
15 | 115e (Footguard)
10 | 4eMG (15e)
10 | TC (Dragoons)
Total: (80) |
Stage 2 | Salamanca, Opening Attack Classes - Line, CavalryFlag-Spawning round, Admin controlled to start - when enemy is encountered proceed with normal Round, reduce enemy tickets to 0.Following the successful storming of Cuidad Rodrigo and later Badajoz, the Anglo-Portuguese army turns northwards, to answer the threat of another French invasion of Portugal by Marshal Marmont. Upon reaching Salamanca the two armies shadow each others movements along the river Tormes, marching in parallel. Marshal Marmont attempts to turn Wellingtons flank, marching South and then west on July 22nd. Initially planning to mirror the French movements and retreat to Portugal, Wellington takes pause as he observes the large gaps developing in Marmoments army along his line of March. Deciding not to waste the opportunity he throws his army on to the offensive, starting by sending his 3rd division to smash Tomierre's divison who are leading the French armies column of march...Allies | France | 10 | 23rd (Hussars)
15 | 23rd (33rd)
20 | LG (KGL)
10 | 92nd (42nd)
10 | 24th (Footguard)
10 | BIR (51st)
10 | Nr21 (Dragoons)
Total: (85) | 10 | 33rd (Hussars)
10 | 1er (45e)
15 | 33rd (84e)
10 | HLI (Legion)
15 | 115e (Footguard)
10 | 4eMG (15e)
10 | TC (Dragoons)
Total: (80) |
Stage 3 | Salamanca Classes - Line, CavalryFlag-Spawning round, reduce enemy tickets to 0.As Tomierre's division give ground quickly Wellington has followed up his initial attack with his previously concealed 4th & 5th division across the valley to engage the entire left-wing of Marmonts army. Sarrut's and Bonet's division advance boldly to meet them and initially make progress but are pushed back by Wellingtons 1st and 7th divisions held in reserve. Marmont still has Ferey's division in reserve to either reinforce his buckling line or to cover the French retreat...Allies | France | 10 | 23rd (Hussars)
15 | 23rd (33rd)
20 | LG (KGL)
10 | 92nd (42nd)
10 | 24th (Footguard)
10 | BIR (51st)
10 | Nr21 (Dragoons)
Total: (85) | 10 | 33rd (Hussars)
10 | 1er (45e)
15 | 33rd (84e)
10 | HLI (Legion)
15 | 115e (Footguard)
10 | 4eMG (15e)
10 | TC (Dragoons)
Total: (80) |
Stage 4 | Garcia Hernandez Classes - Line, CavarlyFlag-Spawning round, France to attempt to hold 2 square formations. Reduce enemy tickets to 0. Cavalry bear in mind that each class will only respawn when the entire unit is dead, try to charge together to be most effective.A few days after the battle of Salamanca the French army continues to beat a hasty retreat to the east, with the allies hard on their heels. Three French batallions of the rear-guard form square to fend off the interest of nearby heavy cavalry, confident that they would not be so reckless as to engage well-formed squares. The heavy cavalry of the Kings German Legion commit to a charge, in a hope to achieve the impossible and rout the squares alone without any support...Allies | France | 25 | 23rd (Hussars)
10 | 33rd (Hussars)
10 | 92nd (Heavy Dragoons)
10 | 24th (Heavy Dragoons)
10 | BIR (Heavy Dragoons)
Total: (65) | 1st Square (1 flag)
10 | 1er (84e)
15 | 33rd (84e)
10 | HLI (84e)
10 | 4eMG (84e)
2nd Square (1 flag)
15 | 115e (45e)
10 | TC (45e)
20 | LG (45e)
10 | Nr21 (45e)
Total: (100) |
Stage 1 | Cuidad Rodrigo - Siege (10mins) Classes - Line, LightsNormal Siege, admin controlled to start - France hold fire and occupy the walls. UK form up in the trench system, ready to rush the breach en masse.The first key to Spain comes in the form of the fortified city of Cuidad Rodrigo. With fresh French corps regrouping in Spain a drawn out siege will not be practicable; The Fort must be taken by storm, whatever the cost. When night falls a small 'Forlorn hope' assembles in the trenches near the breach, in an attempt to surprise the defenders. A serjeant leads these brave men and should he survive a commission awaits him...Britain | France | 10 | 33rd (Cavalry)
10 | 92nd (Light)
10 | 1stEB (Line)
10 | Nr21 (Line)
20 | 33rd (Line)
15 | 92nd (Line)
15 | 96y (Line)
15 | LG (Line)
Total: (105) | 10 | 45th (Cavalry)
10 | BC (Light)
15 | 16th (Line)
15 | 18pp (Line)
20 | 25pp (Line)
25 | 45th (Line)
10 | HLI (Line)
Total: (105) |
Stage 2 | Salamanca, opening attack - Battle (10mins) Classes - Lines, Lights, CavalryNormal BattleFollowing the successful storming of Cuidad Rodrigo and later Badajoz, the Anglo-Portuguese army turns northwards, to answer the threat of another French invasion of Portugal by Marshal Marmont. Upon reaching Salamanca the two armies shadow each others movements along the river Tormes, marching in parallel. Marshal Marmont attempts to turn Wellingtons flank, marching South and then west on July 22nd. Initially planning to mirror the French movements and retreat to Portugal, Wellington takes pause as he observes the large gaps developing in Marmoments army along his line of March. Deciding not to waste the opportunity he throws his army on to the offensive, starting by sending his 3rd division to smash Tomierre's divison who are leading the French armies column of march...Britain | France | 10 | 33rd (Cavalry)
10 | 92nd (Light)
10 | 1stEB (Line)
10 | Nr21 (Line)
20 | 33rd (Line)
15 | 92nd (Line)
15 | 96y (Line)
15 | LG (Line)
Total: (105) | 10 | 45th (Cavalry)
10 | BC (Light)
15 | 16th (Line)
15 | 18pp (Line)
20 | 25pp (Line)
25 | 45th (Line)
10 | HLI (Line)
Total: (105) |
Stage 3 | Salamanca, British offensive - Battle (10mins) Classes - Lines, CavalryNormal BattleWith Tomierre's division giving ground, Wellington now launches his previously concealed 4th & 5th division across the valley to engage the entire left-wing of Marmonts army; the French are in a desperate situation, strung out in column of march and will have to act quickly if they hope to hold their ground...Britain | France | 10 | 1stEB (Cavalry)
10 | Nr21 (Cavalry)
30 | 33rd (Cavalry)
25 | 92nd (Cavalry)
Total: (75) | 10 | 45th (Cavalry)
10 | BC (Line)
15 | 16th (Line)
15 | 18pp (Line + Train)
20 | 25pp (Line)
25 | 45th (Line + Train)
15 | 96y (Line + Train)
15 | LG (Line)
10 | HLI (Line)
Total: (135) |
Stage 4 | Salamanca, French offensive - Battle (10mins) Classes - Lines, Lights, CavalryNormal BattleThe situation is beginning to look dire for the French, their left-wing now near breaking point. In an attempt to turn the tide of the battle Sarrut's and Bonet's division boldly advance on Wellingtons centre, initially making some head way. Wellington brings up his 1st and 7th divisions to shore up his damaged centre or the battle may be lost...Britain | France | 10 | 33rd (Cavalry)
10 | 92nd (Light)
10 | 1stEB (Line)
10 | Nr21 (Line)
20 | 33rd (Line)
15 | 92nd (Line)
15 | 96y (Line)
15 | LG (Line)
Total: (105) | 10 | 45th (Cavalry)
10 | BC (Light)
15 | 16th (Line)
15 | 18pp (Line)
20 | 25pp (Line)
25 | 45th (Line)
10 | HLI (Line)
Total: (105) |
Stage 5 | Salamanca, the rear-guard - Battle (10mins) Classes - Lines, Lights, CavalryNormal BattleAfter bitter fighting in the centre the French divisions of Sarrut and Bonet are eventually forced back across the plain, giving Marmont's army no choice but to withdraw. Ferey's division bravely take up position on the high ground of Los Arapiles Grande, to hold off the allies whilst the remainder of the French forces escape...Britain | France | 10 | 33rd (Cavalry)
10 | 92nd (Light)
10 | 1stEB (Line)
10 | Nr21 (Line)
20 | 33rd (Line)
15 | 92nd (Line)
15 | 96y (Line)
15 | LG (Line)
Total: (105) | 10 | 45th (Cavalry)
10 | BC (Light)
15 | 16th (Line)
15 | 18pp (Line)
20 | 25pp (Line)
25 | 45th (Line)
10 | HLI (Line)
Total: (105) |
Stage 6 | Garcia Hernandez - Siege (10mins) Classes - Lines, CavalryHold the Square, UK give France 2 minutes to form the squares then proceed with Normal Siege. France will form 2 squares (numbers dependant!), the regiments to be involved in each are marked below.A few days after the battle of Salamanca the French army continues to beat a hasty retreat to the east, with the allies hard on their heels. Three French regiments of the rear-guard form square to fend off the interest of nearby heavy cavalry, confident that they would not be so reckless as to engage well-formed squares. The heavy cavalry of the Kings German Legion commit to a charge, in a hope to achieve the impossible and rout the squares alone without any support... Britain | France | 10 | 1stEB (Line)
10 | Nr21 (Line)
20 | 33rd (Line)
25 | 92nd (Line)
15 | 96y (Line)
15 | LG (Line)
10 | BC (Line)
15 | 16th (Line)
15 | 18pp (Line)
20 | 25pp (Line)
35 | 45th (Line)
10 | HLI (Line)
Total: (200) | 80-100 | Bots (Cavalry)
Total: (-) |
(1812) - Invasion of Russia
Napoleon's invasion of Russia on 24th June 1812 saw a staggering 860,000 strong force strike towards Moscow, consisting of French troops and their numerous allies. Early Success is soon whittled away by a lack of supplies for the French force, the Russians depriving the land of resources as it retired deeper into Russia. The French must gain a decisive victory over the Russian army; this coupled with capturing Moscow may force the Tsar to sue for peace... Flag-spawning Stage 1 | Smolensk Classes - Lines, CavalryNormal Flag-Spawning Round - reduce enemy tickets to 0.Having had no opportunity thus far to cut the Russian retreat short early in the campaign, Napoleon devises a Manoeuvre around Smolensk, in an attempt to sweep behind the Russians and inflict a decisive defeat. Bagration's corps fortunately occupies Smolensk a few days prior and is able to stall the French advance in the suburbs of the City...Russia | France | 10 | 33rd (Hussars)
15 | 33rd (Line Militia)
10 | 24th (Simbirskiy)
10 | HLI (Pavlovskiy)
15 | LG (Footguard)
15 | 92nd (Lancers)
10 | 1stHess (Dragoons)
Total: (85) | 10 | 23rd (Hussars)
10 | 1er (45e)
15 | 23rd (84e)
10 | Nr19 (Legion)
15 | 1erFusGre (Footguard)
15 | 12th (Dragoons)
10 | BIR (Lancers)
Total: (85) |
Stage 2 | Borodino, Raevsky redoubt Classes - Lines, ArtillerySiege Flag-Spawning Round (FiC & RiC permitted) Each regiment may take an artilleryman and sapper.After constant retreat, Kutuzov is re-appointed as commander of the Russian army, and prepares for one defensive action close to Moscow. A series of redoubts are hastily constructed to anchor the Russian line, the most imposing of these situated at Raevsky's position on the Russian right flank, dominating the heights above Borodino. This position must be held, or the entire Russian line of defence will become untenable...Russia | France | 25 | 33rd (Line Militia)
10 | 24th (Simbirskiy)
10 | HLI (Pavlovskiy)
15 | LG (Footguard)
15 | 92nd (Lancers)
10 | 1stHess (Dragoons)
Total: (85) | 10 | 1er (45e)
25 | 23rd (84e)
10 | Nr19 (Legion)
15 | 1erFusGre (Footguard)
15 | 12th (Dragoons)
10 | BIR (Lancers)
Total: (85) |
Stage 3 | Borodino, Bagration Fleches Classes - Lines, CavalryNormal Flag-Spawning Round - reduce enemy tickets to 0.As the struggle for the Raevsky redoubt rages on the Russian right, Davout hits their centre in force, supported by Desaix, Ney and Murat. The Russian centre is marked by sizeable redoubts in the shape of arrow heads, dispersed across the plain. After the initial attack by the French is met with some success, the Russians continue to reinforce this crucial position from their reserve...Russia | France | 10 | 33rd (Hussars)
15 | 33rd (Line Militia)
10 | 24th (Simbirskiy)
10 | HLI (Pavlovskiy)
15 | LG (Footguard)
15 | 92nd (Lancers)
10 | 1stHess (Dragoons)
Total: (85) | 10 | 23rd (Hussars)
10 | 1er (45e)
15 | 23rd (84e)
10 | Nr19 (Legion)
15 | 1erFusGre (Footguard)
15 | 12th (Dragoons)
10 | BIR (Lancers)
Total: (85) |
Stage 4 | Borodino, Utitsa Classes - LightsNormal Flag-Spawning Round - reduce enemy tickets to 0.Hoping to turn the Russian left flank, Polish troops under Poniatowski move against the village of Utitsa to the south. The surrounding terrain however is difficult; surrounding brushland and woods are populated with large numbers of Russian light infantry. Poniatowski sends forward his own skirmishers to flush out the Russians swiftly. If the Polish cannot make progress in this sector of the field, then their contribution to the battle raging to the north will be non-existant...Russia | France | 25 | 33rd (Line Militia)
10 | 24th (Simbirskiy)
10 | HLI (Pavlovskiy)
15 | LG (Footguard)
15 | 92nd (Lancers)
10 | 1stHess (Dragoons)
Total: (85) | 10 | 1er (45e)
25 | 23rd (84e)
10 | Nr19 (Legion)
15 | 1erFusGre (Footguard)
15 | 12th (Dragoons)
10 | BIR (Lancers)
Total: (85) |
Event Stages:Stage 1 - Smolensk, suburbs - Conquest (10mins)Spoiler Lines, Lights, CavalryNormal ConquestHaving had no opportunity thus far to cut the Russian retreat short early in the campaign, Napoleon devises a Manoeuvre around Smolensk, in an attempt to sweep behind the Russians and inflict a decisive defeat. Bagration's corps fortunately occupies Smolensk a few days prior and is able to stall the French advance in the suburbs of the City. France | Russia | (5-10) - 33rd Cavalry Troop (Cavalry)
(10-15) - 92nd (Lights)
(10-15) - Nr19 (Line)
(15-20) - Nr21 (Line)
(15-20) - 33rd Line coy (Line)
(10-15) - 73e (Line)
(10-15) - VG_Gre (Line)
Total: (75 - 110) | (10-15) - 16th Cavalry Troop (Cavalry)
(5-10) - k.k. PK (Lights)
(20-25) - 16th Line coy (Line)
(15-20) - 25pp (Line)
(10-15) - 32nd (Line)
(20-25) - 45th (Line)
Total: (80 - 110) |
Spoiler LineAdmin Controlled Battle, form up on the admin in two ranksBagration's corps fights successful stalling actions around Smolensk, allowing the remainder of the Russian army to retreat further north. The fierce cannonade from the French however has caused the City to begin to burn. Bagration orders his troops to fight tenacious rear-guard actions, to prevent the French from recovering any supplies, before the city inevitably burns to the ground... France | Russia | (5-10) - 33rd Cavalry Troop (Line)
(10-15) - 92nd (Line)
(10-15) - Nr19 (Line)
(15-20) - Nr21 (Line)
(15-20) - 33rd Line coy (Line)
(10-15) - 73e (Line)
(10-15) - VG_Gre (Line)
Total: (75 - 110) | (10-15) - 16th Cavalry Troop (Line)
(5-10) - k.k. PK (Line)
(20-25) - 16th Line coy (Line)
(15-20) - 25pp (Line)
(10-15) - 32nd (Line)
(20-25) - 45th (Line)
Total: (80 - 110) |
Spoiler Lines, LightsNormal SiegeAfter constant retreat, Kutuzov is re-appointed as commander of the Russian army, and prepares for one defensive action close to Moscow. A series of redoubts are hastily constructed to anchor the Russian line, the most imposing of these situated at Raevsky's position on the Russian right flank, dominating the heights above Borodino. This position must be held, or the entire Russian line of defence will become untenable... France | Russia | (5-10) - 33rd Cavalry Troop (Line)
(10-15) - 92nd (Lights)
(10-15) - Nr19 (Line)
(15-20) - Nr21 (Line)
(15-20) - 33rd Line coy (Line)
(10-15) - 73e (Line)
(10-15) - VG_Gre (Line)
Total: (75 - 110) | (10-15) - 16th Cavalry Troop (Line)
(5-10) - k.k. PK (Lights)
(20-25) - 16th Line coy (Line)
(15-20) - 25pp (Line)
(10-15) - 32nd (Line)
(20-25) - 45th (Line)
Total: (80 - 110) |
Spoiler Lines, Lights, Cavalry1-2 rounds of Normal BattleAs the struggle for the Raevsky redoubt rages on the Russian right, Davout hits their centre in force, supported by Desaix, Ney and Murat. The Russian centre is marked by sizeable redoubts in the shape of arrow heads, dispersed across the plain. After the initial attack by the French is met with some success, the Russians continue to reinforce this crucial position from their reserve... France | Russia | (5-10) - 33rd Cavalry Troop (Cavalry)
(10-15) - 92nd (Lights)
(10-15) - Nr19 (Line)
(15-20) - Nr21 (Line)
(15-20) - 33rd Line coy (Line)
(10-15) - 73e (Line)
(10-15) - VG_Gre (Line)
Total: (75 - 110) | (10-15) - 16th Cavalry Troop (Cavalry)
(5-10) - k.k. PK (Lights)
(20-25) - 16th Line coy (Line)
(15-20) - 25pp (Line)
(10-15) - 32nd (Line)
(20-25) - 45th (Line)
Total: (80 - 110) |
Spoiler LightsNormal battle, with FiC & RiC permittedHoping to turn the Russian left flank, Polish troops under Poniatowski move against the village of Utitsa to the south. The surrounding terrain however is difficult; surrounding brushland and woods are populated with large numbers of Russian light infantry. Poniatowski sends forward his own skirmishers to flush out the Russians swiftly. If the Polish cannot make progress in this sector of the field, then their contribution to the battle raging to the north will be non-existant... France | Russia | (5-10) - 33rd Cavalry Troop (Lights)
(10-15) - 92nd (Lights)
(10-15) - Nr19 (Lights)
(15-20) - Nr21 (Lights)
(15-20) - 33rd Line coy (Line)
(10-15) - 73e (Lights)
(10-15) - VG_Gre (Lights)
Total: (75 - 110) | (10-15) - 16th Cavalry Troop (Lights)
(5-10) - k.k. PK (Lights)
(20-25) - 16th Line coy (Lights)
(15-20) - 25pp (Lights)
(10-15) - 32nd (Lights)
(20-25) - 45th (Lights)
Total: (80 - 110) |
(1812) - Retreat from Russia
Both the Russians and French having fought eachother to a stalemate at the battle of Borodino, the Russians withdraw leaving the field to the battered Grande Armee. The Russian capital ever in his sights, Napoleon follows and steps foot in Moscow only days later. it's capture does not hail the Victory he seeks however, as the Russian army remains. The dire situation of supply is brought to a head when incendiaries set the city alight, burning much of the ancient capital to the ground. With little choice remaining The French army begins an agonising retreat back across hostile territory, with winter closing in... Event Stages:Stage 1 | Maloyaroslavets | Battle 1-2 Rounds Classes - Line, Lights, CavalryNormal BattleNapoleon first attempts a move directly south, where his retreat would follow a route not already deprived of all its natural resources. Eugene's corps clashes with Russian troops at Maloyaroslavets, both sides fighting desperately to hold the bridge head; If the French cannot retreat by this route, they will have to return to the border by the same road which they advanced...Russia | France | 10 | 33rd (Cavalry)
10 | 92nd (Light)
10 | 1stEB (Line)
10 | Nr21 (Line)
20 | 33rd (Line)
15 | 92nd (Line)
15 | 96y (Line)
15 | LG (Line)
Total: (105) | 10 | 45th (Cavalry)
10 | BC (Light)
15 | 16th (Line)
15 | 18pp (Line)
20 | 25pp (Line)
25 | 45th (Line)
10 | HLI (Line)
Total: (105) |
Stage 2 | The Retreat | Battle 1-2 Rounds Classes - Lines, Lights, CavalryNormal BattleFollowing the failure to push through at Maloyaroslavets, the French begin to retreat the way they came. Each Corps fights tenacious rear-guard actions, as the weather gradually turns worse...Russia | France | 10 | 33rd (Cavalry)
10 | 92nd (Light)
10 | 1stEB (Line)
10 | Nr21 (Line)
20 | 33rd (Line)
15 | 92nd (Line)
15 | 96y (Line)
15 | LG (Line)
Total: (105) | 10 | 45th (Cavalry)
10 | BC (Light)
15 | 16th (Line)
15 | 18pp (Line)
20 | 25pp (Line)
25 | 45th (Line)
10 | HLI (Line)
Total: (105) |
Stage 3 | Cossack raids | Escort Classes - Lines, CavalryFrance must protect it's baggage trains from the Russian horseman; reaching the end of the road with at least 1 train to win the round! Unlimited Lives, FiC permitted.The prolonged retreat is taking its toll on the Grande Armee; under constant attack, they must protect their baggage and supply line to sustain themselves and the rest of the retreating army, during the Russian winter...Russia | France | 10 | 1stEB (Cavalry)
10 | Nr21 (Cavalry)
30 | 33rd (Cavalry)
25 | 92nd (Cavalry)
Total: (75) | 10 | 45th (Cavalry)
10 | BC (Line)
15 | 16th (Line)
15 | 18pp (Line + Train)
20 | 25pp (Line)
25 | 45th (Line + Train)
15 | 96y (Line + Train)
15 | LG (Line)
10 | HLI (Line)
Total: (135) |
Stage 4 | Crossing the Berezina | Bridge Building Classes - Lines, Lights, CavalryFrance must attempt to re-build the bridge across the Berezina river to safety within the time limit; capture of the Russian siege flag (across the river) signalling success. Both sides have unlimited Lives, FiC and RiC permitted, each unit permitted 1 sapper.The French troops are now only a stones throw away from the Polish border, only to find that the Berezina river has thawed and blocks their path. Their engineers must work quickly to assemble a crossing, still under attack by the vengeful Russians...Russia | France | 10 | 33rd (Cavalry)
10 | 92nd (Light)
10 | 1stEB (Line)
10 | Nr21 (Line)
20 | 33rd (Line)
15 | 92nd (Line)
15 | 96y (Line)
15 | LG (Line)
Total: (105) | 10 | 45th (Cavalry)
10 | BC (Light)
15 | 16th (Line)
15 | 18pp (Line)
20 | 25pp (Line)
25 | 45th (Line)
10 | HLI (Line)
Total: (105) |
Please note that this Event makes use of Server-side scripts which alter the appearance/equipment of some units, so as a result some client-side mods might not work as intended!
(1813) - Battle of Vitoria
Following Wellington's success at the Battle of Salamanca and Napoleon's disastrous campaign in Russia the previous year, the Allied army finds itself outnumbering the French in the peninsular. Looking to draw further success from this rare advantage, Wellingtion advances once again into Spain at the head of 121,000 British, Portuguese and Spanish troops. The allied aim is to cut off Marshal Jourdan's army in Spain from their lines of communication to France; Wellington moves his Army across Northern Spain, Jourdan having to mobilize quickly to face the new danger. He chooses to make his stand around Vitoria, hoping to halt the allied advance... Event Stages:Stage 1 | La Puebla heights | Battle (10mins) Classes - Line, Lights, CavalryNormal BattleSuccess at Vitoria for the British and their allies relies on four attack columns, all converging around Vitoria in sufficient time to support one another. The first of these columns commanded by General Hill, commences its attack in the early hours of June 21st to take the La Puebla heights, threatening the French left flank. General Gazan responds by reinforcing the heights, as a bitter struggle for the high ground ensues...France | Britain | 10 | 33rd (Cavalry)
10 | 92nd (Light)
15 | 18pp (Line)
10 | Nr21 (Line)
20 | 33rd (Line)
15 | 92nd (Line)
10 | HLI (Line)
15 | LG_Preo (Line)
Total: (105) | 10 | 45th (Cavalry)
10 | BC (Light)
10 | 1stEB (Line)
15 | 16th (Line)
25 | 45th (Line)
15 | 96y (Line)
20 | LG_Sem (Line)
Total: (105) |
Stage 2 | Attack in the centre | Battle (10mins) Classes - Lines, Lights, CavalryNormal BattleThe conflict on the Puebla heights still raging, Hill continues with his other divisions along the Burgos road toward Vitoria and the main French positions. He chooses his timing well, coordinating with the advance of another British column of attack under the command of the Duke himself; Wellington's troops cross the Zadorra river at the hairpin bend, to threaten General Gazan's now tenuous position...France | Britain | 10 | 33rd (Cavalry)
10 | 92nd (Light)
15 | 18pp (Line)
10 | Nr21 (Line)
20 | 33rd (Line)
15 | 92nd (Line)
10 | HLI (Line)
15 | LG_Preo (Line)
Total: (105) | 10 | 45th (Cavalry)
10 | BC (Light)
10 | 1stEB (Line)
15 | 16th (Line)
25 | 45th (Line)
15 | 96y (Line)
20 | LG_Sem (Line)
Total: (105) |
Stage 3 | Picton's offensive | Battle (10mins) Classes - Lines, CavalryNormal BattleGeneral Gazan is forced to gradually relinquish ground in the centre, as Wellington and Hill make progress. The situation threatens to take a disastrous turn for the French, as Picton's division from General Dalhousie's 3rd column crosses the Zadorra closer to Vitoria from the north west. General D'erlon commanding the French second line, is all that stands in the way of the French centre being entirely surrounded...France | Britain | 10 | 33rd (Cavalry)
10 | 92nd (Light)
15 | 18pp (Line)
10 | Nr21 (Line)
20 | 33rd (Line)
15 | 92nd (Line)
10 | HLI (Line)
15 | LG_Preo (Line)
Total: (105) | 10 | 45th (Cavalry)
10 | BC (Light)
10 | 1stEB (Line)
15 | 16th (Line)
25 | 45th (Line)
15 | 96y (Line)
20 | LG_Sem (Line)
Total: (105) |
Stage 4 | Graham's offensive | Siege (10mins) Classes - Lines, LightsNormal SiegeCome midday General Graham arrives via the Bilbao road from the north, leading the 4th and final column, planning to cut-off the entirety of the French army from their line of retreat to the east. General Sarrut's division must hold this vital bridge across the Zadora, or the battle will not only be lost but the entire French army may be forced to surrender...France | Britain | 10 | 92nd (Light)
15 | 18pp (Line)
10 | Nr21 (Line)
30 | 33rd (Line)
15 | 92nd (Line)
10 | HLI (Line)
15 | LG_Preo (Line)
Total: (105) | 10 | BC (Light)
10 | 1stEB (Line)
15 | 16th (Line)
35 | 45th (Line)
15 | 96y (Line)
20 | LG_Sem (Line)
Total: (105) |
Stage 5 | The Final push | Admin (10mins) Classes - Lines, LightsForm up and advance as indicated by the admin. Light companies be prepared to advance ahead of the rest of the team in skirmish order.Jourdan's French army stand there ground and keep good order despite having been attacked on all fronts; General D'erlon manages to delay Pictons attack long enough for Gazan to retreat towards Vitoria and Sarut's division hold on to the bridge to the north. With the French now on the back foot however, Wellington wastes no time in delivering the final blow, ordering his three now combined columns to attack the last French line of defense...France | Britain | 100 | Infantry bots
~ | Artillery
Total: (100) | 25 | 92nd (Light)
10 | BC (Light)
10 | 1stEB (Light)
15 | 16th (Line)
15 | 18pp (Line)
10 | Nr21 (Line)
30 | 33rd (Line)
35 | 45th (Line)
15 | 96y (Line)
10 | HLI (Line)
15 | LG_Preo (Line)
20 | LG_Sem (Line)
Total: (210) |
(1813) - Battle of Leipzig 
It's mid-1813 and the Emperor Napoleon has re-built in part his Grande Armee, after the disastrous results of the Russian campaign last year. With all of Europe arrayed against him, Napoleon intends to knock-out one of the main powers to even the odds and potentially gain a temporary peace to buy him time to consolidate his position. After three months of campaigning in German territory mixed with meagre victories and defeats, The French make a stand around the city of Leipzig. Napoleon has chosen his ground well with the areas surrounding Leipzig split into multiple sectors by many rivers with bridges connecting these areas close to the city, giving the French superiority to manoeuvre. The allies do however outnumber the French by a huge margin and almost completely encircle their force around Leipzig; will the allies work together effectively and defeat the once master of Europe or will history repeat itself with the 'Little Corporal' defeating the two Allied Emperor's again, as he did 8 years before?
Event Stages:Stage 1 | Defending the Manor House | Siege (10mins) Classes - Lines, LightsNormal SiegeOn the first day of battle, 16th October Polish and Austrian troops clash along the Pleiße river to the south of Leipzig; the defence of a manor house becomes critical for the Polish troops, controlling two bridges across the river...France | Austrians | 10 | SPACE (Light)
15 | 16th (Line)
15 | 18pp (Line)
10 | Nr21 (Line)
30 | 33rd (Line)
10 | HLI (Line)
15 | LG_Preo (Line)
Total: (105) | 10 | 92nd (Light)
10 | 1stEB (Line)
35 | 45th (Line)
15 | 92nd (Line)
15 | 96y (Line)
20 | LG_Sem (Line)
Total: (105) |
Stage 2 | Crossing at Connewitz | Battle (10mins) Classes - Lines, Lights, CavalryNormal BattleDespite having been denied an easy crossing of the Pleiße river, Kleist continues with his Austrian II corps along the southern bank of the river to another crossing by the village of Connewitz...France | Austrians | 10 | 33rd (Cavalry)
10 | SPACE (Light)
15 | 16th (Line)
15 | 18pp (Line)
10 | Nr21 (Line)
20 | 33rd (Line)
10 | HLI (Line)
15 | LG_Preo (Line)
Total: (105) | 10 | 45th (Cavalry)
10 | 92nd (Light)
10 | 1stEB (Line)
25 | 45th (Line)
15 | 92nd (Line)
15 | 96y (Line)
20 | LG_Sem (Line)
Total: (105) |
Stage 3 | Cavalry action at Liebertwolkwitz | Battle (10mins) Classes - CavalryAdmin Controlled Battle - France form up in 4 ranks on the admin, Allies form up seperately in your regiments and await directionThe allies unable to make a breakthrough and the Grande Armee holding its own on four fronts, Napoleon quickly moves to concentrate as much of his forces to the southern sector of the battlefield as possible, hoping to defeat the army under Schwarzenberg in detail so he can then turn to face the other threats. After a severe pounding to their centre from his grand battery on gallows hill, Napoleon orders 10,000 cavalry under Murat to make his breakthrough; a combined force of Russian, Austrian and Prussian cavalry must prevent their onslaught, else the fate of the battle will be in little doubt...France | Allies | 10 | SPACE (Cavalry)
15 | 16th (Cavalry)
15 | 18pp (Cavalry)
10 | Nr21 (Cavalry)
30 | 33rd (Cavalry)
10 | HLI (Cavalry)
15 | LG_Preo (Cavalry)
Total: (105) | 10 | 1stEB (Cavalry)
35 | 45th (Cavalry)
25 | 92nd (Cavalry)
15 | 96y (Cavalry)
20 | LG_Sem (Cavalry)
Total: (105) |
Stage 4 | Bluchers Offensive | Battle (10mins) Classes - Lines, Lights, CavalryNormal BattleBlucher and his Prussian/Russian corps meanwhile push from the north, attacking Ney's position on the river Pleiße in force...France | Allies | 10 | 33rd (Cavalry)
10 | BC (Light)
15 | 16th (Line)
15 | 18pp (Line)
10 | Nr21 (Line)
20 | 33rd (Line)
10 | HLI (Line)
15 | LG_Preo (Line)
Total: (105) | 10 | 45th (Cavalry)
10 | 92nd (Light)
10 | 1stEB (Line)
25 | 45th (Line)
15 | 92nd (Line)
15 | 96y (Line)
20 | LG_Sem (Line)
Total: (105) |
Stage 5 | Saxons defect | Battle (10mins) Classes - LineAdmin Controlled Battle - Both teams form up in the street, next to eachother, each in two columns.Late on the second day of the battle the situation is looking most dire for the french; without a single effective breakthrough in the allied line, Napoleon has been forced on the defensive along his entire line of battle, which shrinks continuously around Leipzig. To make matters worse some of his troops are questioning their loyalties; to the east of leipzig an entire division of Saxon troops advances on the allied line as if to charge, only to defect to their side and turn their muskets upon the french troops defending the road to the Halle gate...France | Saxony | 10 | SPACE (Line)
15 | 16th (Line)
15 | 18pp (Line)
10 | Nr21 (Line)
30 | 33rd (Line)
10 | HLI (Line)
15 | LG_Preo (Line)
Total: (105) | 10 | 1stEB (Line)
35 | 45th (Line)
25 | 92nd (Line)
15 | 96y (Line)
20 | LG_Sem (Line)
Total: (105) |
Stage 6 | Defence of the Halle gate | Siege (8mins) Classes - Lines & LightsNormal SiegeLeft with no alternative, Napoleon begins to evacuate his army over the river to the west of Leipzig under cover of darkness. As day breaks on the third day of the battle the allies quickly move to envelop the retreating french troops. Taking the city will be no easy task however as Oudinot's corps remains to stall the allies, defending every gate, street and building in the city...France | Allies | 10 | SPACE (Light)
15 | 16th (Line)
15 | 18pp (Line)
10 | Nr21 (Line)
30 | 33rd (Line)
10 | HLI (Line)
15 | LG_Preo (Line)
Total: (105) | 10 | 92nd (Light)
10 | 1stEB (Line)
35 | 45th (Line)
15 | 92nd (Line)
15 | 96y (Line)
20 | LG_Sem (Line)
Total: (105) |
(1815) - Battle of Ligny UNDER CONSTRUCTION (1815) - Battle of Quatres Bras Following Napoleons return to France in 1815 he decides to seize the initiative and attempt to knock-out the nearest allied armies, which could bring the rest of the coalition nations to the negotiating table. The French Emperor's plan is to drive a wedge between the Prussian and Anglo-Dutch armies stationed in Belgium and defeat them in detail, a strategy that had proved successful for him many times before. The Allies learn almost too late of Napoleons advance into Belgium through Chaleroi, with Prussian forces engaging him first and then retreating towards Ligny. Wellington in command of the Anglo Dutch forces concentrates his own troops as fast as he can to the cross-roads of Quatres Bras, hoping to join Bluchers Prussians at Ligny... Event Stages:Stage 1 | First Contact at Frasnes | Battle Classes - Lines, CavalryRP Battle - Lancers form a double column along the road on the admin, UK take cover either side of the road. When UK opens fire France may break formation and charge.On the 15th June having received intelligence of the French advance, the Prince of Orange moves first to and then south of Quatres Bras to halt Marshal Ney's advance. Nassau Infantry encounter a squadron of Polish Lancers moving along the road up from Frasnes, greeting them with a volley to prevent their advance...Allies | France | 10 | k.k. PK (Line)
15 | 18pp (Line)
10 | Nr19 (Line)
15 | 32nd (Line)
30 | 33rd (Line)
30 | 45th (Line)
Total: (110) | 10 | 92nd (Cavalry)
35 | 16th (Cavalry)
15 | Nr21 (Cavalry)
15 | 98° (Cavalry)
15 | 73e (Cavalry)
Total: (90) |
Stage 2 | Defence of Gemioncourt | Siege Classes - Lines, LightsNormal SiegeNo further action takes place until the next day on the 16th at 2pm; Marshal Ney appearing extremely uncertain of the strength of the force opposing him at the crossroads, which was previously hopelessly outnumbered. Dutch troops of Bylandt's brigade hold Gemioncourt farm far south of the crossroads and hold off the overwhelming French troops as long as they can...Allies | France | 10 | 33rd (Cavalry)
10 | k.k. PK (Lights)
15 | 18pp (Line)
10 | Nr19 (Line)
20 | 33rd (Line)
30 | 45th (Line)
Total: (95) | 10 | 16th (Cavalry)
10 | 92nd (Lights)
25 | 16th (Line)
15 | Nr21 (Line)
15 | 98° (Line)
15 | 32nd (Line)
15 | 73e (Line)
Total: (105) |
Stage 3 | Holding the Cross-roads | Battle Classes - Line, Lights, CavalryNormal BattleEventually forced out of Gemioncourt farm, the Dutch retreat in good order back to the cross roads of Quatres Bras at 3pm. Fortunately they held on long enough for the British 9th Brigade to arrive, forming a barrier in front of Quatres Bras and extending to the Allied Left flank - protecting the route to Ligny, which Wellington still holds hope of reinforcing. Re-organising themselves the combined French divisions advance all along the line to meet the allies...Allies | France | 10 | 33rd (Cavalry)
10 | k.k. PK (Lights)
15 | 18pp (Line)
10 | Nr19 (Line)
20 | 33rd (Line)
30 | 45th (Line)
Total: (95) | 10 | 16th (Cavalry)
10 | 92nd (Lights)
25 | 16th (Line)
15 | Nr21 (Line)
15 | 98° (Line)
15 | 32nd (Line)
15 | 73e (Line)
Total: (105) |
Stage 4 | Kellerman's Charge | Battle Classes - Lines, CavalryRP battle - UK form up on the admin outside of the wood in two ranks, France form up in the dead ground out of sight.The French under Jerome come dangerously close to capturing the crossroads, but with the arrival of the British 3rd Division from Nivelles their advance is checked. Ney quickly realises that the shift in the balance now puts him in a precarious position, neither allowing him to take the crossroads nor hold it. He quickly dispatches for D'erlons I corps to support him whilst committing his only Cuirassier brigade to the fray, in attempt to break through to the crossroads. The heavy cavalry advance in the 'dead ground' of the valley unseen, towards the oblivious British 5th brigade who are deployed in line...Allies | France | 10 | k.k. PK (Line)
15 | 18pp (Line)
10 | Nr19 (Line)
15 | 32nd (Line)
30 | 33rd (Line)
30 | 45th (Line)
10 | 92nd (Line)
Total: (120) | 35 | 16th (Cavalry)
15 | Nr21 (Cavalry)
15 | 98° (Cavalry)
15 | 73e (Cavalry)
Total: (80) |
Stage 5 | Guards division Counter-attack | Battle Classes - LineNormal BattleSaved only by fleeing into the Bosu wood behind them, the battered 5th Brigade re-group. Fortunately for the allies D'erlons I corps never arrived at Quatres Bras. Instead with the timely arrival of the British 1st (Guards) division, Wellington is finally able to counter attack; The British Guards advance through the Bosu wood to turn the French left flank, sending out their light companies to clear the woodland as they advance. A combined arms force of French cavalry and infantry meets them as they break free from the cover of the trees...Allies | France | 10 | k.k. PK (Lights)
10 | 92nd (Lights)
15 | 18pp (Line)
10 | Nr19 (Line)
20 | 33rd (Line)
30 | 45th (Line)
Total: (95) | 10 | 16th (Cavalry)
10 | 33rd (Cavalry)
25 | 16th (Line)
15 | Nr21 (Line)
15 | 98° (Line)
15 | 32nd (Line)
15 | 73e (Line)
Total: (105) |
(1815) - Battle of Waterloo
On the 16th June it becomes apparent to the Allied Armies under Marshal Blucher and Wellington that Napoleon has siezed the initative and entered Belgium. The French succeed in splitting the Allied forces, holding them in place at the Battles of Quatres Bras and Ligny. The Allies both withdraw, hoping to reunite and defeat the french wherever possible - on this understanding Wellington takes a stand at the field of Waterloo. He holds a strong defensive position on the reverse slope of the Mont St Jeane ridge, with the farmhouses of Hougoumont on his left, La Haye Sainte in his center and Papelotte on his right, to anchor his defensive line in place. With both Armies awaiting battle the night before the 18th June, the stakes could not be higher... Event Stages:Stage 1 - Defence of Hougoumont - Siege (8mins)Spoiler Lines, LightsNormal SiegeThe battle having been delayed for many hours by the waterlogged ground, Jerome's Division attacks the allied right at 11:30, intending to draw reserves from Wellingtons' Centre. As the anchor of Wellingtons right flank, holding this farmhouse will be critical. A bitter struggle ensues as it becomes clear to the French that the British Coldstream guards will defend the farmhouse to the last man... Allies | France | (10) - 1steIvN (Line)
(10) - 92nd (Lights)
(5-10) - 1steIvN (Line)
(5-10) - 1stAD (Line)
(10-15) - 16th (Line)
(10-15) - 18pp (Line)
(10-15) - 32nd (Line)
(10-15) - 92nd (Line)
Total: (70 - 100) | (10) - 33rd Cavalry Company (Line)
(10) - 33rd Light Company (Lights)
(5-10) - 2ndHess (Line)
(10-15) - Nr.28 (Line)
(15-20) - 33rd Line Companies (Line)
(10-15) - 56e (Line)
(5-10) - k.k. PK (Line)
Total: (65 - 90) |
Spoiler Lines, Lights, CavalryNormal LineBattle (1-2 rounds)Shortly after engaging Hougoumont, D'erlon's I Corps begins it's major offensive on the British centre, attempting to break the Allied line in one swift blow... Allies | France | (10) - 1steIvN (Cavalry)
(10) - 92nd (Lights)
(5-10) - 1steIvN (Line)
(5-10) - 1stAD (Line)
(10-15) - 16th (Line)
(10-15) - 18pp (Line)
(10-15) - 32nd (Line)
(10-15) - 92nd (Line)
Total: (70 - 100) | (10) - 33rd Cavalry Company (Cavalry)
(10) - 33rd Light Company (Lights)
(5-10) - 2ndHess (Line)
(10-15) - Nr.28 (Line)
(15-20) - 33rd Line Companies (Line)
(10-15) - 56e (Line)
(5-10) - k.k. PK (Line)
Total: (65 - 90) |
Spoiler UK: Heavy Cavalry / France: Artillery, LancersAdmin Controlled Battle - UK form up at Spawn together in the dead ground. French Arty man the gun positions, Lancers take position behind with the Admin.Wtih D'erlon's offensive making headway in the centre, Wellington commits his Household and Heavy Cavalry brigades, scattering the French Infantry. In their thirst for glory however the brave horseman continue pursuit to the French side of the valley, intending to take the enemy gun positions. The british cavalry are by now blown, exhausted and in a precarious position should they be counter-charged... Allies | France | (10) - 1steIvN (Heavy Cavalry)
(10) - 92nd (Heavy Cavalry)
(5-10) - 1steIvN (Heavy Cavalry)
(5-10) - 1stAD (Heavy Cavalry)
(10-15) - 16th (Heavy Cavalry)
(10-15) - 18pp (Heavy Cavalry)
(10-15) - 32nd (Heavy Cavalry)
(10-15) - 92nd (Heavy Cavalry)
Total: (70 - 100) | (10) - 33rd Cavalry Company (Lancers)
(10) - 33rd Light Company (Lancers)
(5-10) - 2ndHess (Lancers)
(10-15) - Nr.28 (Artillery)
(15-20) - 33rd Line Companies (Artillery)
(10-15) - 56e (Artillery)
(5-10) - k.k. PK (Lancers)
Total: (65 - 90) |
Spoiler Lines, Lights, Cavalry - (if cavalry class occupants wish to)Normal SiegeLike Hougoumont on the right, the defence of La Haye Sainte in the centre will prove decisive to the British defence; If captured Napoleon will use farmhouse as an anchor from which to break Wellington's centre. The defence is undertaken by men of the Kings German Legion, but after prolonged fighting and being cut-off from the allied line after D'erlons attack, their ammunition if running short... Allies | France | (10) - 1steIvN (Cavalry or line)
(10) - 92nd (Lights)
(5-10) - 1steIvN (Line)
(5-10) - 1stAD (Line)
(10-15) - 16th (Line)
(10-15) - 18pp (Line)
(10-15) - 32nd (Line)
(10-15) - 92nd (Line)
Total: (70 - 100) | (10) - 33rd Cavalry Company (Cavalry or line)
(10) - 33rd Light Company (Lights)
(5-10) - 2ndHess (Line)
(10-15) - Nr.28 (Line)
(15-20) - 33rd Line Companies (Line)
(10-15) - 56e (Line)
(5-10) - k.k. PK (Line)
Total: (65 - 90) |
Spoiler UK: Line / France: CavalryUK form and try to maintain the square formation to protect the flag with 2/3 Lives, FiC permitted for this Round. France have unlimited lives.Believing the British centre to be sufficiently weakened and mistaking the movement of wounded to the rear as full retreat, Marshal Ney commits the French Cavalry reserves to an all-out offensive. Regardless of Ney's misinterpretation of the events, the thundering hooves of the best cavalry France has to offer may prove enough to hammer Wellingtons centre into submission...[/i] Allies | France | (15-20) - 1steIvN (Line)
(5-10) - 1stAD (Line)
(5-10) - 2ndHess (Line)
(10-15) - 16th (Line)
(10-15) - 18pp (Line)
(10-15) - Nr.28 (Line)
(10-15) - 32nd (Line)
(35-40) - 33rd (Line)
(10-15) - 56e (Line)
(20-25) - 92nd (Line)
(5-10) - k.k. PK (Line)
Each Regiment take 1 artillerymen who will take one shot and then retreat to the square!
Total: (135 - 190) | (50-80) Bots, number increased after each wave (Cavalry)
^^ 2-3 bots commanders to attack the square from all sides continuously ^^
Total: (65 - 90) |
Spoiler Line.Admin Controlled Battle - UK form 2 rank deep line behind the ridge / France Form Line, 4-6 ranks deepLa Haye Sainte finally succumbs to French attacks in the centre and in the wake of its fall Napoleon commits his Imperial Guard to the perilously frail allied Centre... Britain | France | Could be played with any of the following:
- All players as Imperial Guard, form attack column and attack British line (bots).
- All players UK and be defend against a large Imperial guard column (lots of bots, super laggy).
- Players both sides, balances as we usually do with a slight favour to France numbers wise (no bots).
Total: (xx - xx) |
Total: (xx - xx)
|
(1854-1855) - Crimean War
The Crimean War was the first grand scale European conflict since the Battle of Waterloo, some 39 years earlier. The Russian empire ever looking to expand its borders, declared war on Turkey and both the empires of Britain and France swiftly moved to support the Turks. By the time British and French troops reached Constantinople however the invasion had largely stalled and was doomed to failure. Undeterred both forces continued in to Russian occupied territory in the Crimea. The series of actions that followed demonstrated both the valour of the common soldier and the incompetence of their superiors in command, whose knowledge of warfare was still firmly rooted in the Napoleonic period; a taste of the grand scale slaughter which would occur a decade later in the American civil war took place on the Crimean peninsular in this futile conflict.Event Stages:Stage 1 - Crossing the Alma - Siege (12mins)Spoiler Lines and LightsAdmin Controlled to Start, then Normal Siege - Russia have 4 LivesHaving landed at Kalamita Bay, the Anglo-French army under Lord Raglan must march South to put Sevastopol under Siege. However, the Russians have blocked the road to the city with formidable redoubts. The British must push through up the hill and rout the Russian defenders or the invasion is over before it has even begun. The Russians, though outnumbered, have the tactical advantage and will make the Allied force pay a bloody price for landing in the Crimea... Russia | Allies | | (10-15) - VG_Cavalry (Line) | (10-15) - 33rd Regiment of Foot Cavalry (Line) | | (10-15) - 70th Regiment of Foot (Lights) | (10-15) - 33rd Regiment of Foot Lights (Lights) | | (20-30) - 2y Brigade (Line + 5arty) | (25-30) - 33rd Regiment of Foot (Line) | | (5-10) - LA (Line) | (10-15) - 32nd Regiment of Foot (Line) | | (5-10) - KHJ (Line) | (10-15) - VG_Grenadiers (Line) | | (10-15) - HMSR (Line) | (10) - KRB (Line) | | (10) - 2e (Line) | | Total: (70-105) | Total: (75-100) |
Spoiler Allies - Highland Infantry. Russia - Light CavalryAdmin Controlled Round - Both Teams form up on Admins in two rank linesThe Turkish defenders on the road to the port are overwhelmed after hours of continued Russian assaults and no support from the surprised Allies. The Russian cavalry are now sweeping through towards the vital port. All that stands in their way is the Thin Red Line of the 93rd Highlanders. Can they see off the thousands of Cossacks and Hussars and save the campaign or will they be swept away and the defence of Balaclava crushed. Russia | Allies | | (10-15) - VG_Cavalry (Cavalry) | (10-15) - 70th Regiment of Foot (Line) | | (10-15) - 33rd Regiment of Foot Cavalry (Cavalry) | (10-15) - 33rd Regiment of Foot Lights (Line) | | (20-30) - 2y Brigade (Cavalry) | (25-30) - 33rd Regiment of Foot (Line) | | (5-10) - LA (Cavalry) | (10-15) - 32nd Regiment of Foot (Line) | | (5-10) - KHJ (Cavalry) | (10-15) - VG_Grenadiers (Line) | | (10) - KRB (Line) | | (10) - 2e (Cavalry) | (10-15) - HMSR (Line) | Total: (60-90) | Total: (85-115) |
Spoiler Allies - Light Cavalry. Russia - Line and ArtilleryAdmin COntrolled Round - Russia Occupy the gun positions and await attack. UK form up in two ranks on the AdminThe situation is precarious for the Allied army; The Russians are dominant on the field and are riding away with the Turkish guns. Can the Light Brigade return the advantage to the Allies? The 13th Light Dragoons, 17th Lancers, 11th Hussars, 9th Light Dragoons and 8th Hussars have received their orders. "Attack sir!" "Attack what? What guns, sir?" "There, my Lord, is your enemy! There are your guns!". So did the 600 ride into the Valley of Death Russia | Allies | | (10-15) - VG_Cavalry (Cavalry) | (10-15) - 33rd Regiment of Foot Cavalry (Cavalry) | | (10-15) - 70th Regiment of Foot (Lights) | (10-15) - 33rd Regiment of Foot Lights (Cavalry) | | (20-30) - 2y Brigade (Artillery) | (25-30) - 33rd Regiment of Foot (Cavalry) | | (5-10) - LA (Line) | (10-15) - 32nd Regiment of Foot (Cavalry) | | (5-10) - KHJ (Line) | (10-15) - VG_Grenadiers (Cavalry) | | (10-15) - HMSR (Line) | (10) - KRB(Cavalry) | | (10) - 2e (Line) | | Total: (70-105) | Total: (75-100) |
Spoiler Lines, Lights, CavalryNormal Battle, 1 or 2 roundsBalaclava remains in Allied hands but the Russians in Sevastopol hold bravely on. On the 5th November 1854 they have another opportunity to drive the English and French invaders out for good! Under the cover of fog the huge Russian army of 70,000 soldiers attacks an inferior British force across the Tchernaya river. In the dense fog, valleys and hills of Inkerman the formations on both sides break down. The fighting is a brutal melee with a fine line between friend and foe. Who will come out victorious in the "Soldier's Battle"? Russia | Allies | | (10-15) - VG_Cavalry (Cavalry) | (10-15) - 33rd Regiment of Foot Cavalry (Cavalry) | | (10-15) - 70th Regiment of Foot (Lights) | (10-15) - 33rd Regiment of Foot Lights (Lights) | | (20-30) - 2y Brigade (Line + 5arty) | (25-30) - 33rd Regiment of Foot (Line) | | (5-10) - LA (Line) | (10-15) - 32nd Regiment of Foot (Line) | | (5-10) - KHJ (Line) | (10-15) - VG_Grenadiers (Line) | | (10-15) - HMSR (Line) | (10) - KRB (Line) | | (10) - 2e (Line) | | Total: (70-105) | Total: (75-100) |
Spoiler Lines, LightsNormal SiegeRussia's primary port on the Black Sea has been under siege for almost 12 months. Cut off from the rest of the Russian army, the 50,000 defenders have turned Sevastopol into an impregnable fortress. With the port blocked by the British navy, Russian naval crews have been drafted into the defence of the fortress. Repeated British, French and Turkish assaults have been held off but with no hope of relief how much longer will the defenders hold out? The British and French have been worn down by cold and disease in the foreign climate but are now emboldened by fresh troops from the homelands and Sardinia's recent involvement in the war. This will be the last great showdown in the Crimean war. Russia | Allies | | (10-15) - VG_Cavalry (Line) | (10-15) - 33rd Regiment of Foot Cavalry (Line) | | (10-15) - 70th Regiment of Foot (Lights) | (10-15) - 33rd Regiment of Foot Lights (Lights) | | (20-30) - 2y Brigade (Line + 5arty) | (25-30) - 33rd Regiment of Foot (Line) | | (5-10) - LA (Line) | (10-15) - 32nd Regiment of Foot (Line + 5arty) | | (5-10) - KHJ (Line) | (10-15) - VG_Grenadiers (Line) | | (10-15) - HMSR (Line) | (10) - KRB (Line) | | (10) - 2e (Line) | | Total: (70-105) | Total: (75-100) |
No Scenario Variant Event Stages:
5-6 Rounds of Battle
Classes - Lines, Lights, Cavalry
Normal Battle but with 2 pre-defined battle groups, see below: - Regiments in each Battle Group must operate together (each has a special class) and stay close to one another.
- The Regiment at the top of each list below are responsible for leading each group, other regiments follow their intentions.
- Individual command of your regiment is still your responsibility and you may pick your own ground and angles (ie. you don't have to line up next to them) you just simply have to follow their intentions; ie. if the leading regiment stops to shoot you do the same, if they move up you move up, etc.
- Cavalry and Lights do not act independently of their group.
Spoiler Left team | Right team | 1st Battalion
(10) - 1steIvN (Cavalry)
(5-10) - 1steIvN (Line)
(10-15) - Nr.28 (Line)
(10-15) - 56e (Line)
(5-10) - k.k. PK (Line)
2nd Battalion
(10) - 92nd (Lights)
(10-15) - 16th (Line)
(10-15) - 92nd (Line)
Total: (70 - 100) | 1st Battalion
(10-15) - 2ndHess (Line)
(10) - 33rd Cavalry Company (Cavalry)
(5-10) - 1stAD (Line)
(10-15) - 18pp (Line)
2nd Battalion
(10) - 33rd Light Company (Lights)
(10-15) - 32nd (Line)
(15-20) - 33rd Line Companies (Line)
Total: (70 - 95) |
OR
5-6 Rounds of Battle
Classes - Lines, Lights, Cavalry
Normal Battle but with 1 pre-defined battle group (Lines only), see below: - All Lines on each team must operate together and stay close to one another.
- One Regiment (announced at the start of each round) is responsible for leading the lines, other regiments must follow their intentions.
- Individual command of your regiment is still your responsibility and you may pick your own ground and angles (ie. you don't have to line up next to them) you just simply have to follow their intentions; ie. if the leading regiment stops to shoot you do the same, if they move up you move up, etc.
- Cavalry and Lights on each team can move independently.
Spoiler Left team | Right team | All Lines:
(5-10) - 1steIvN (Line)
(10-15) - 16th (Line)
(10-15) - Nr.28 (Line)
(10-15) - 56e (Line)
(10-15) - 92nd (Line)
(5-10) - k.k. PK (Line)
Independent Specials classes:
(10) - 1steIvN (Cavalry)
(10) - 92nd (Lights)
Total: (70 - 100) | All Lines:
(5-10) - 1stAD (Line)
(10-15) - 2ndHess (Line)
(10-15) - 18pp (Line)
(10-15) - 32nd (Line)
(15-20) - 33rd Line Companies (Line)
Independent Specials classes:
(10) - 33rd Cavalry Company (Cavalry)
(10) - 33rd Light Company (Lights)
Total: (70 - 95) |
|


 ══════════════════════════════════════════


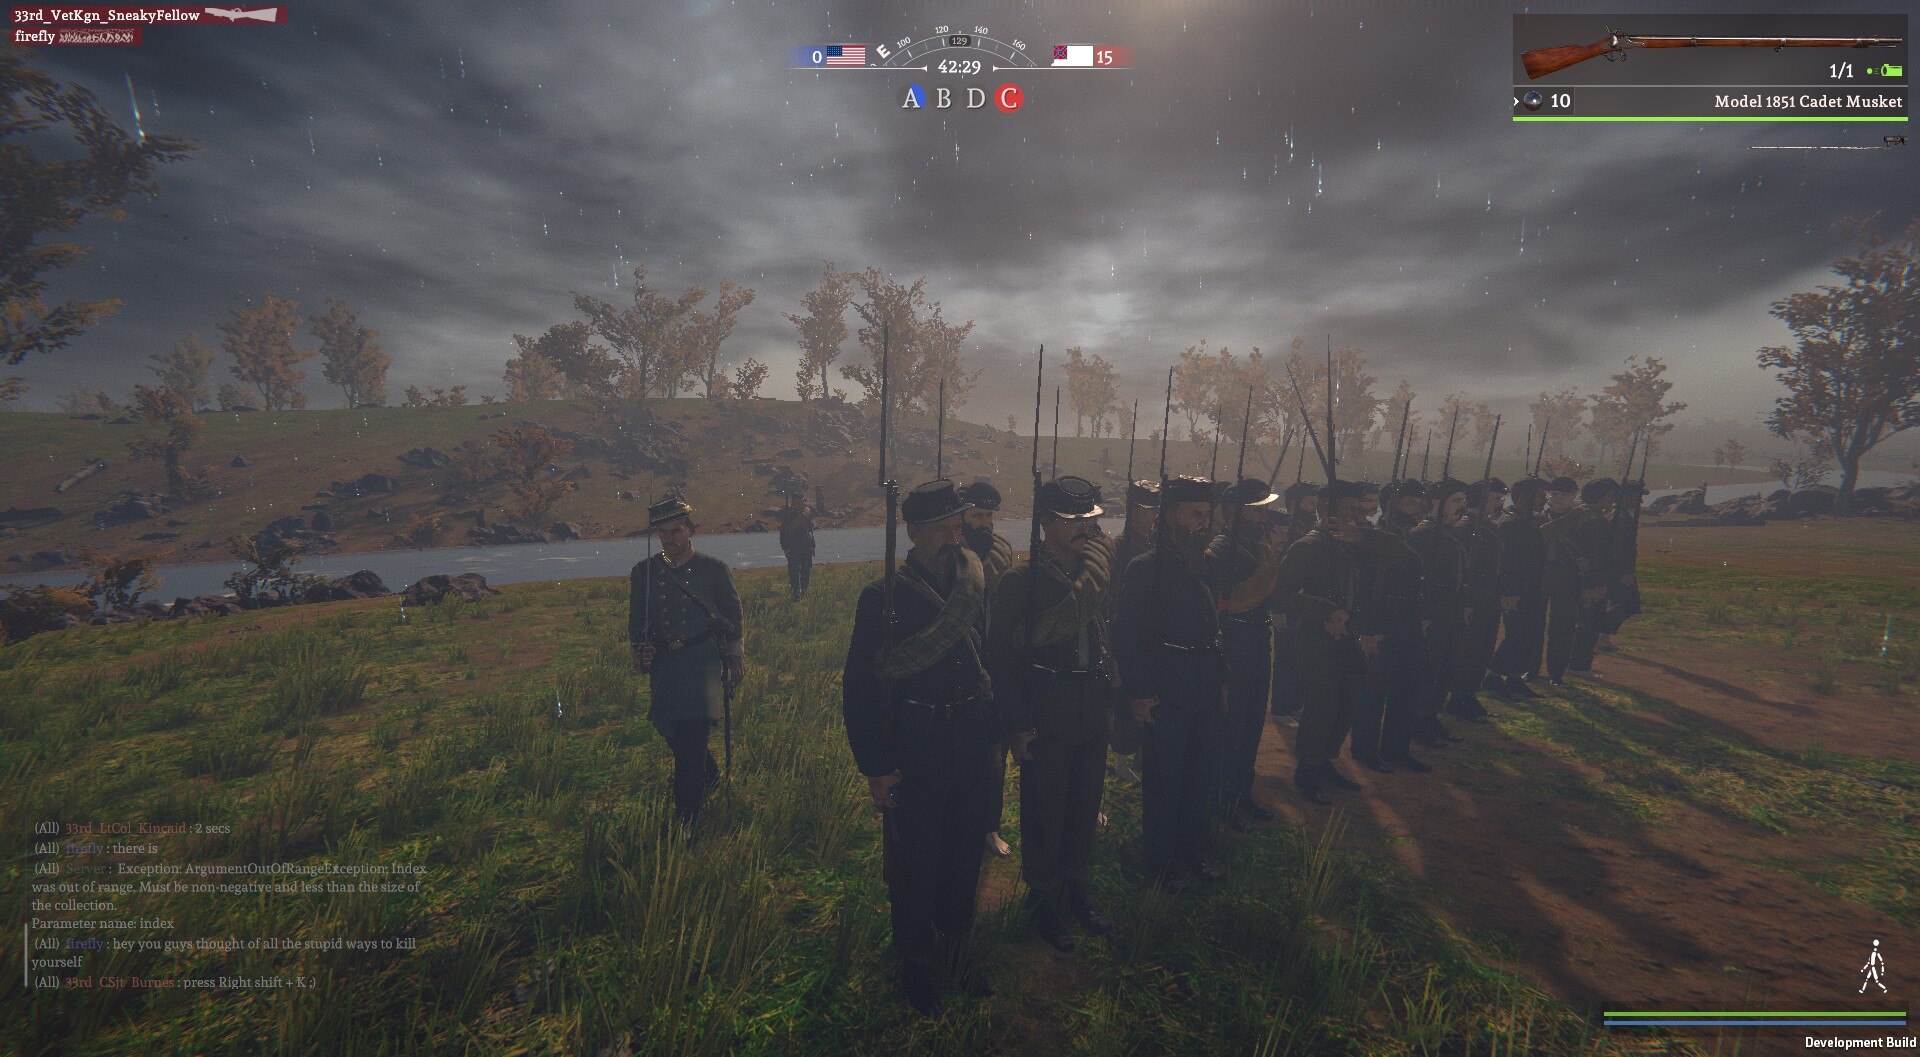
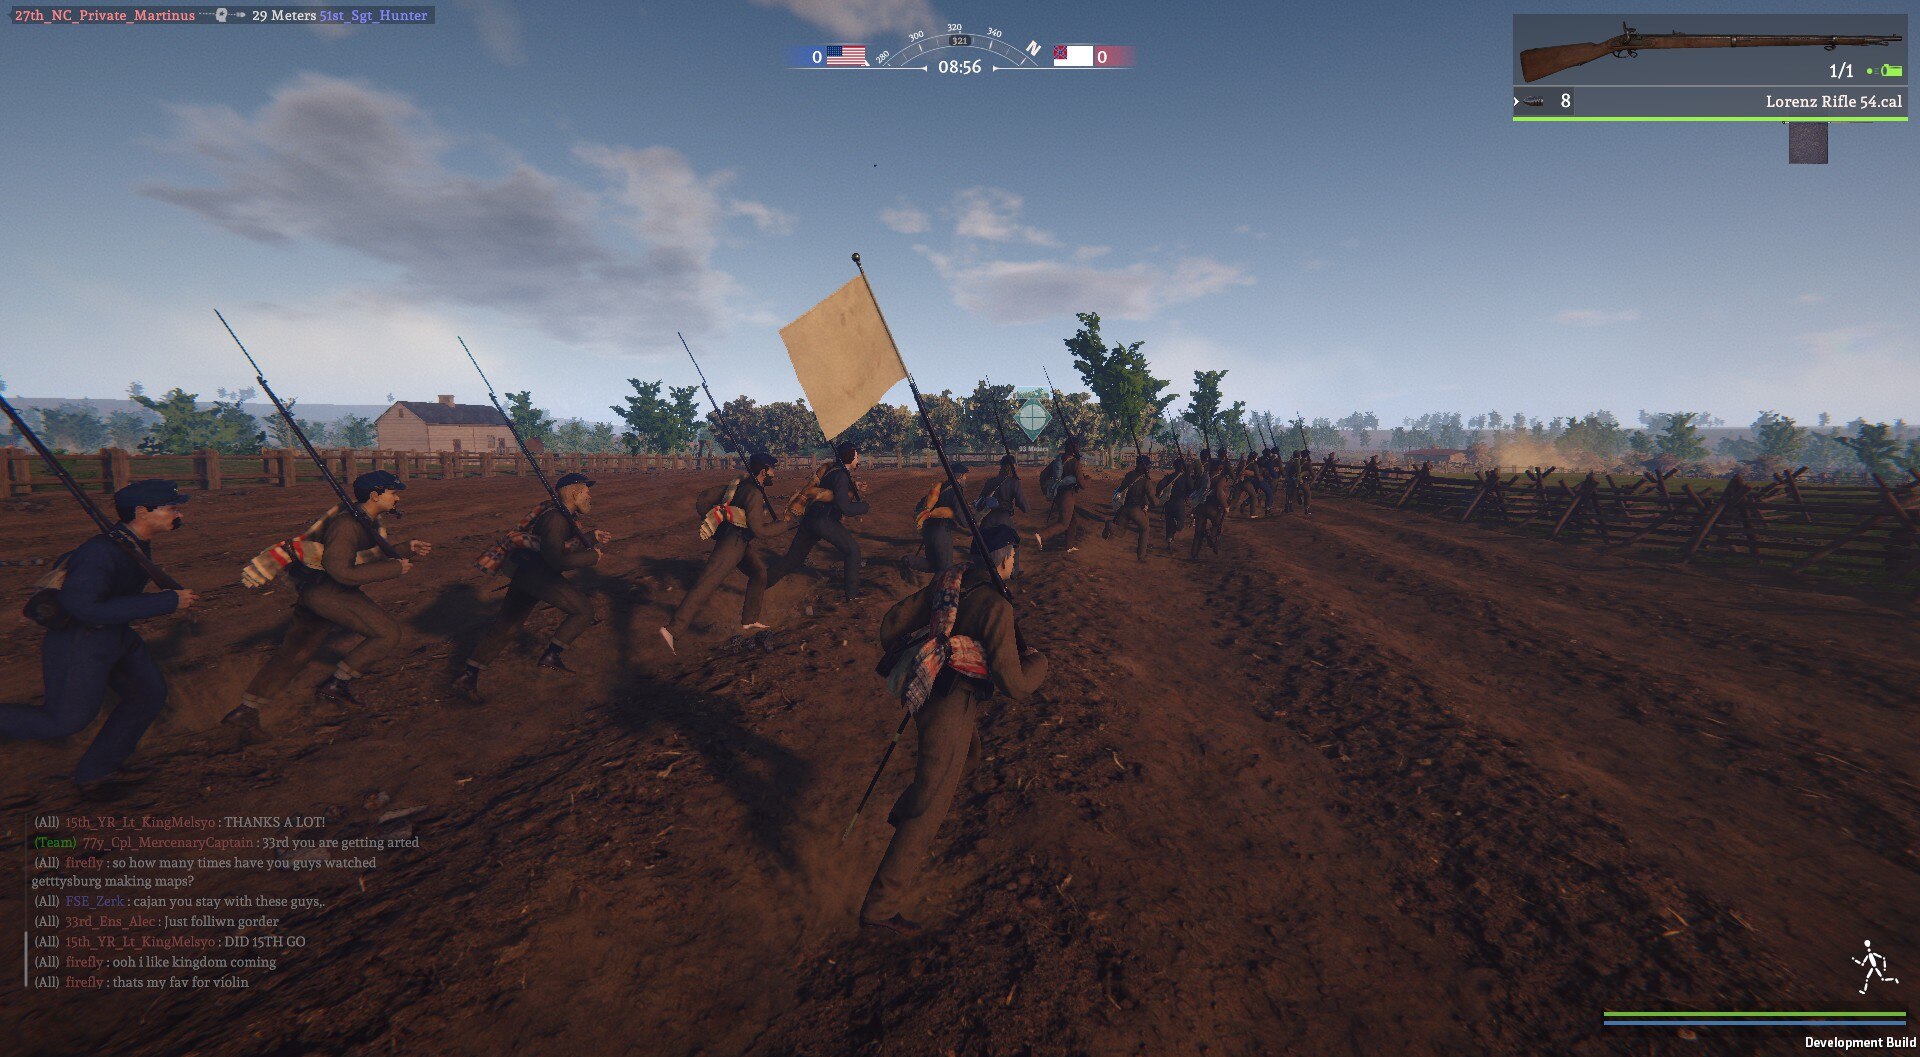


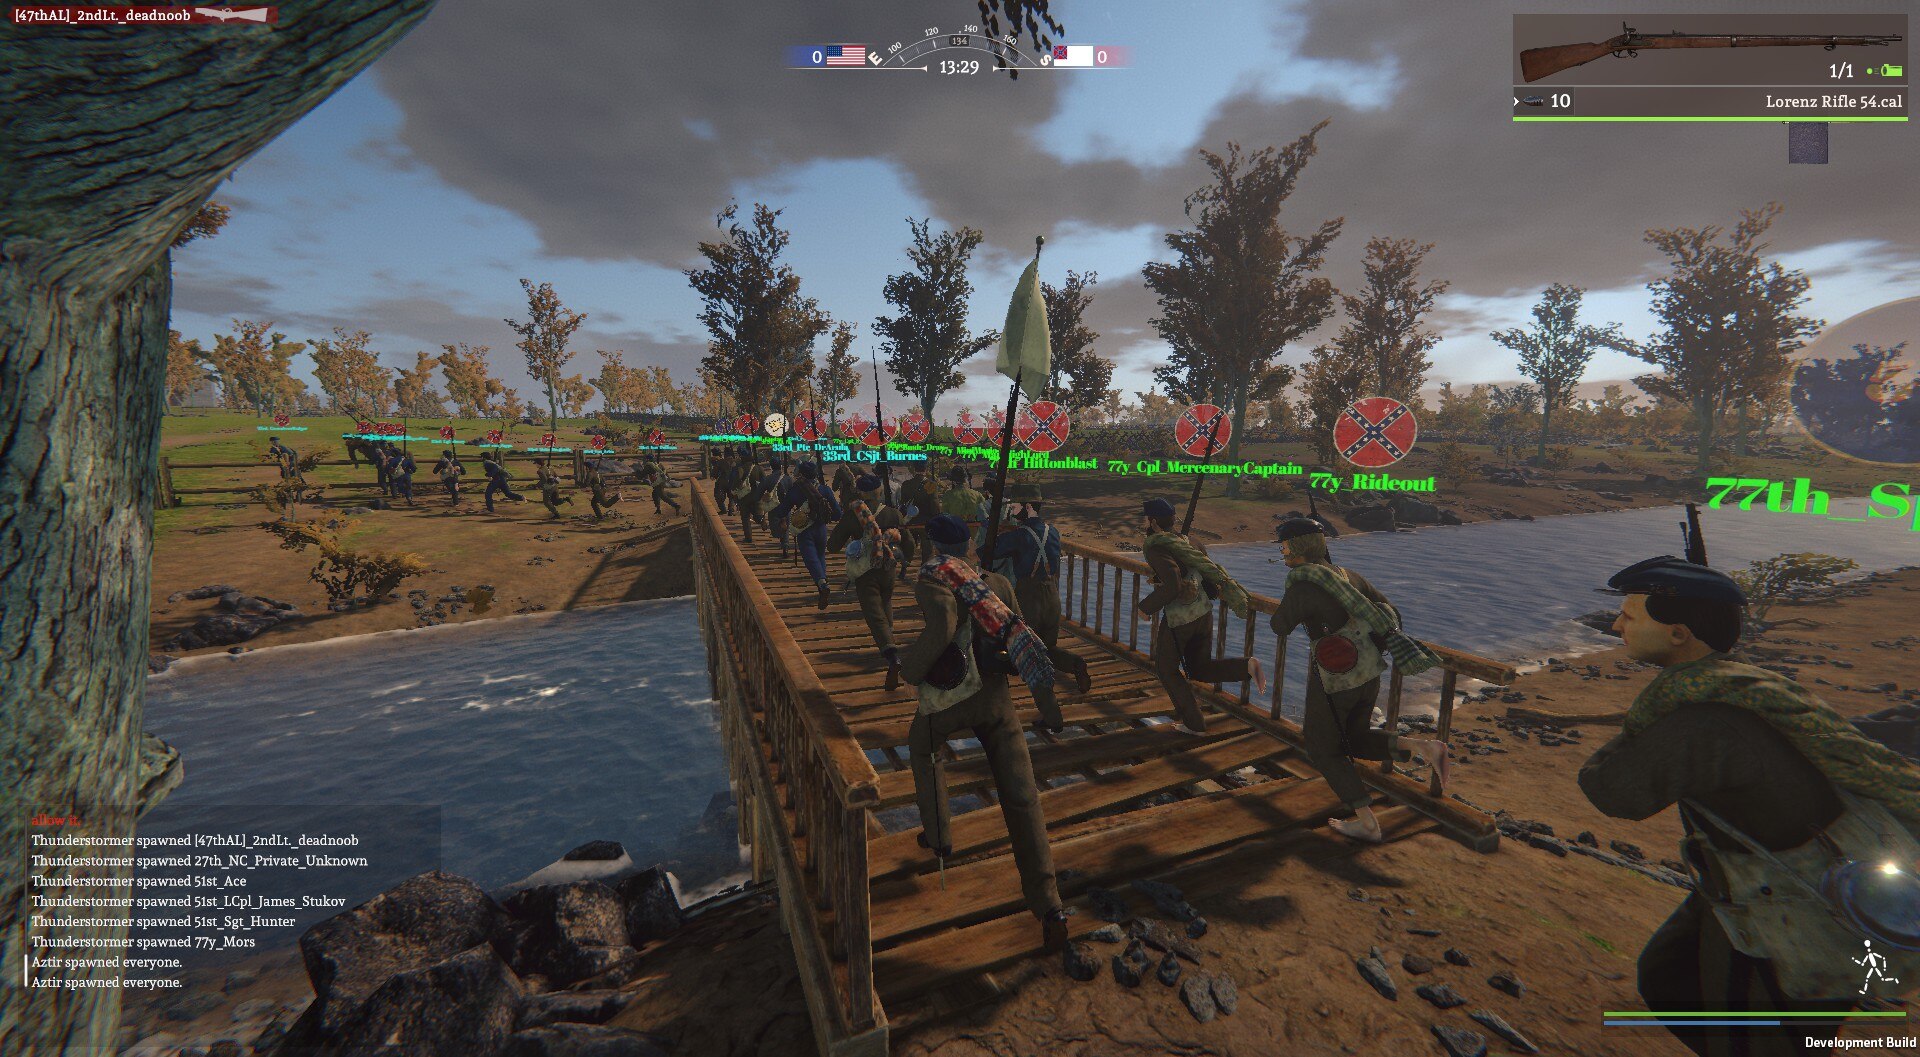


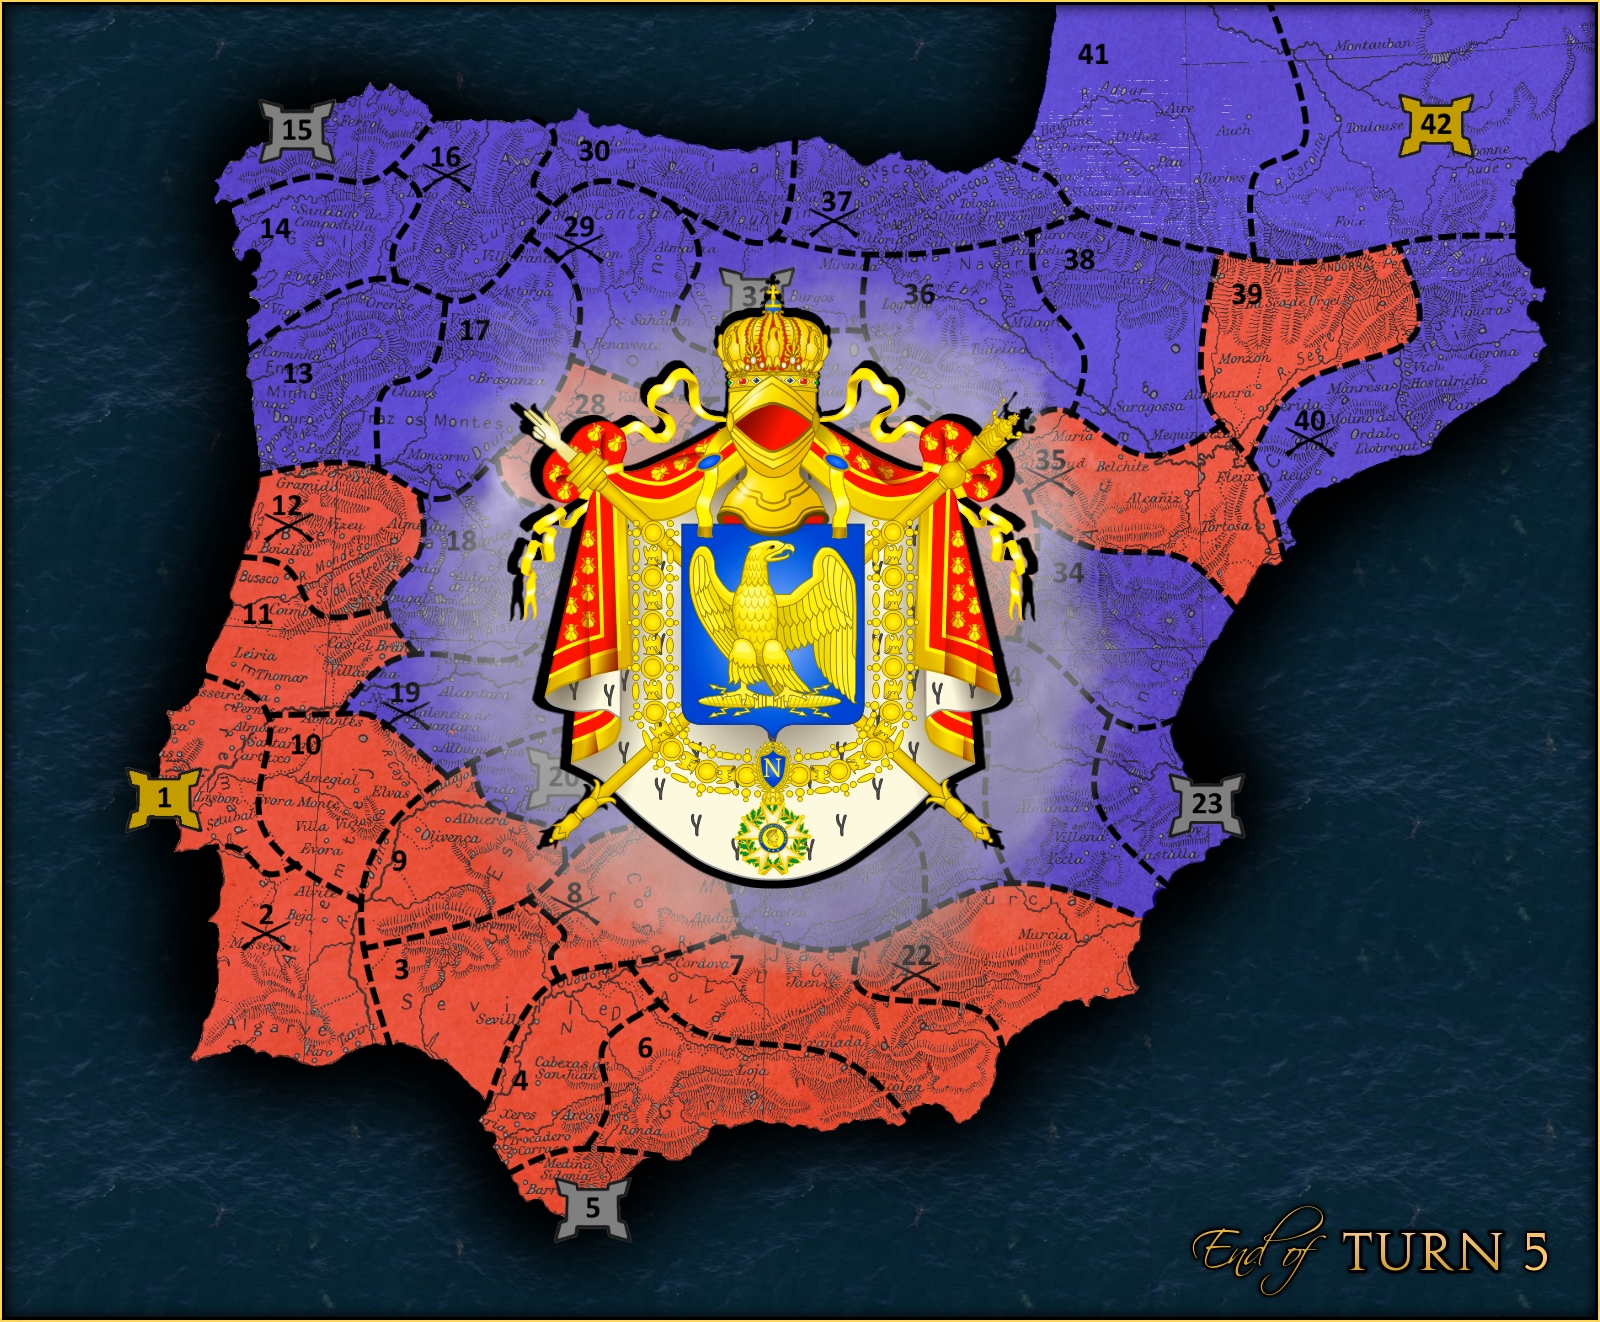


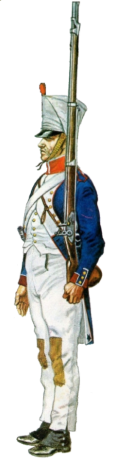


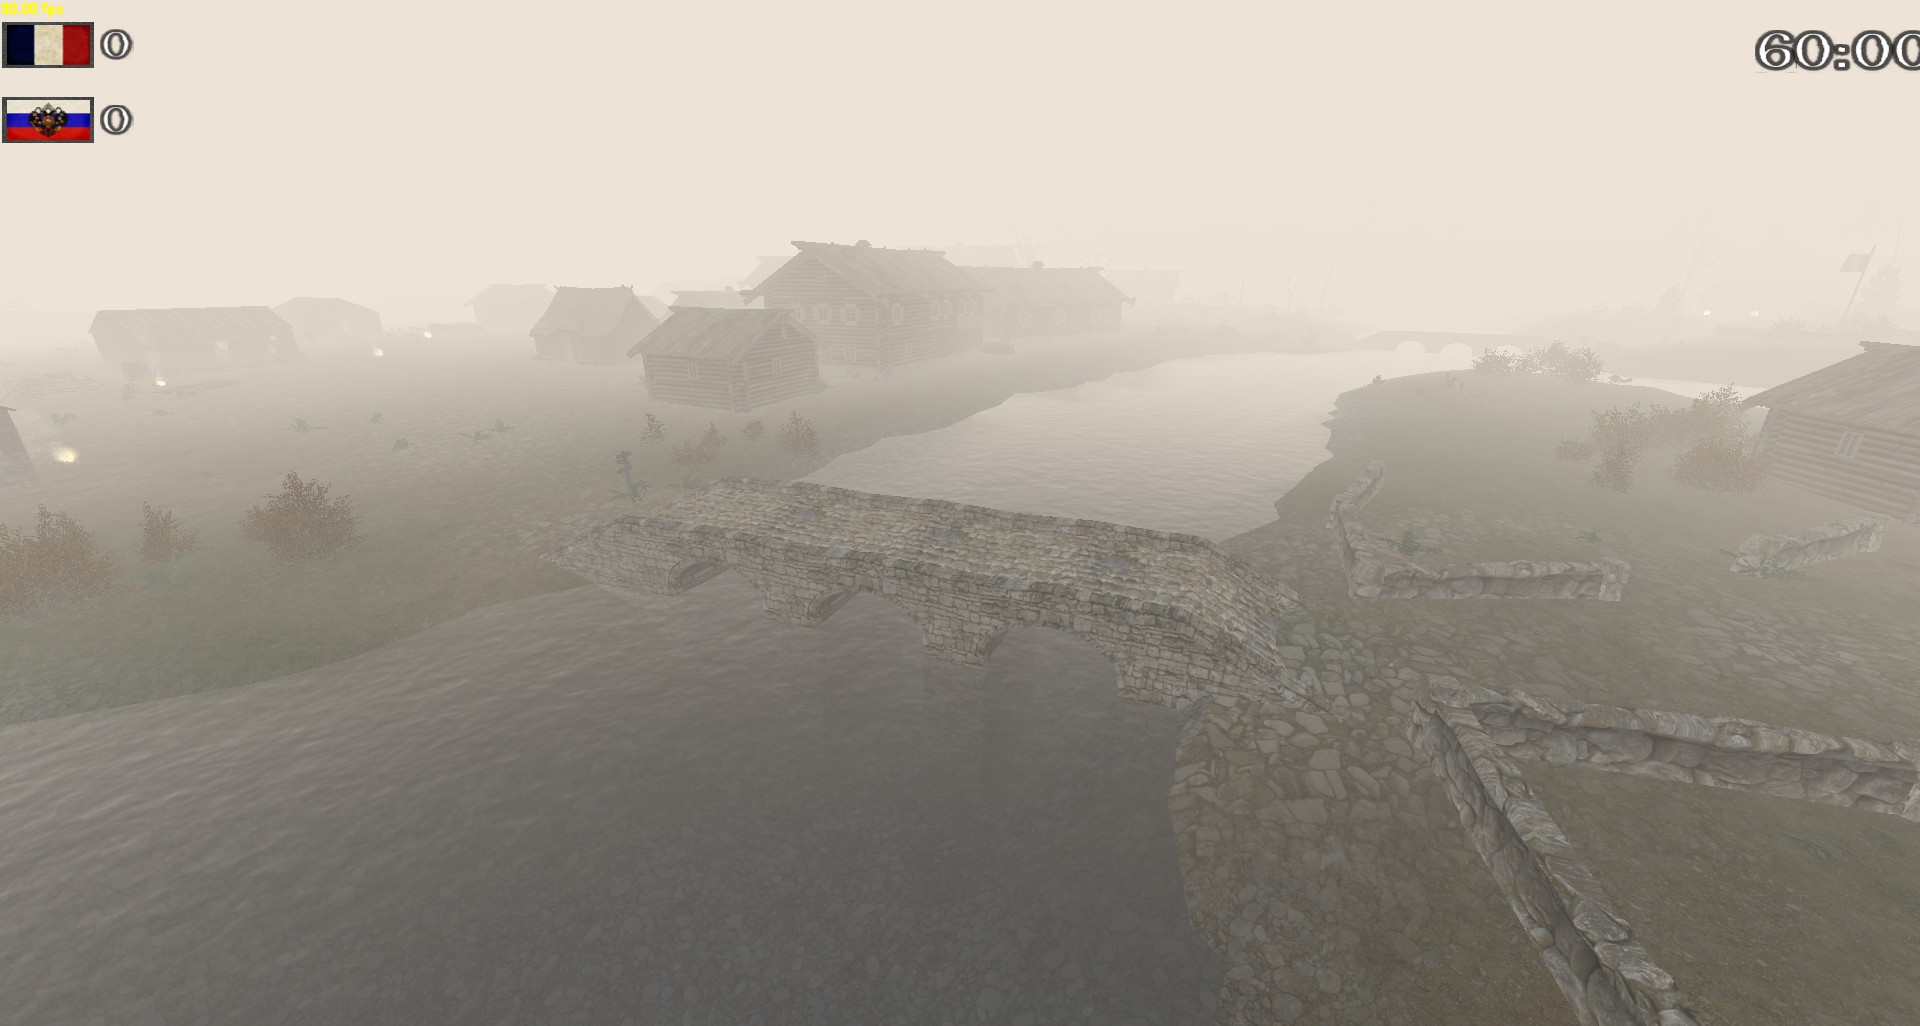
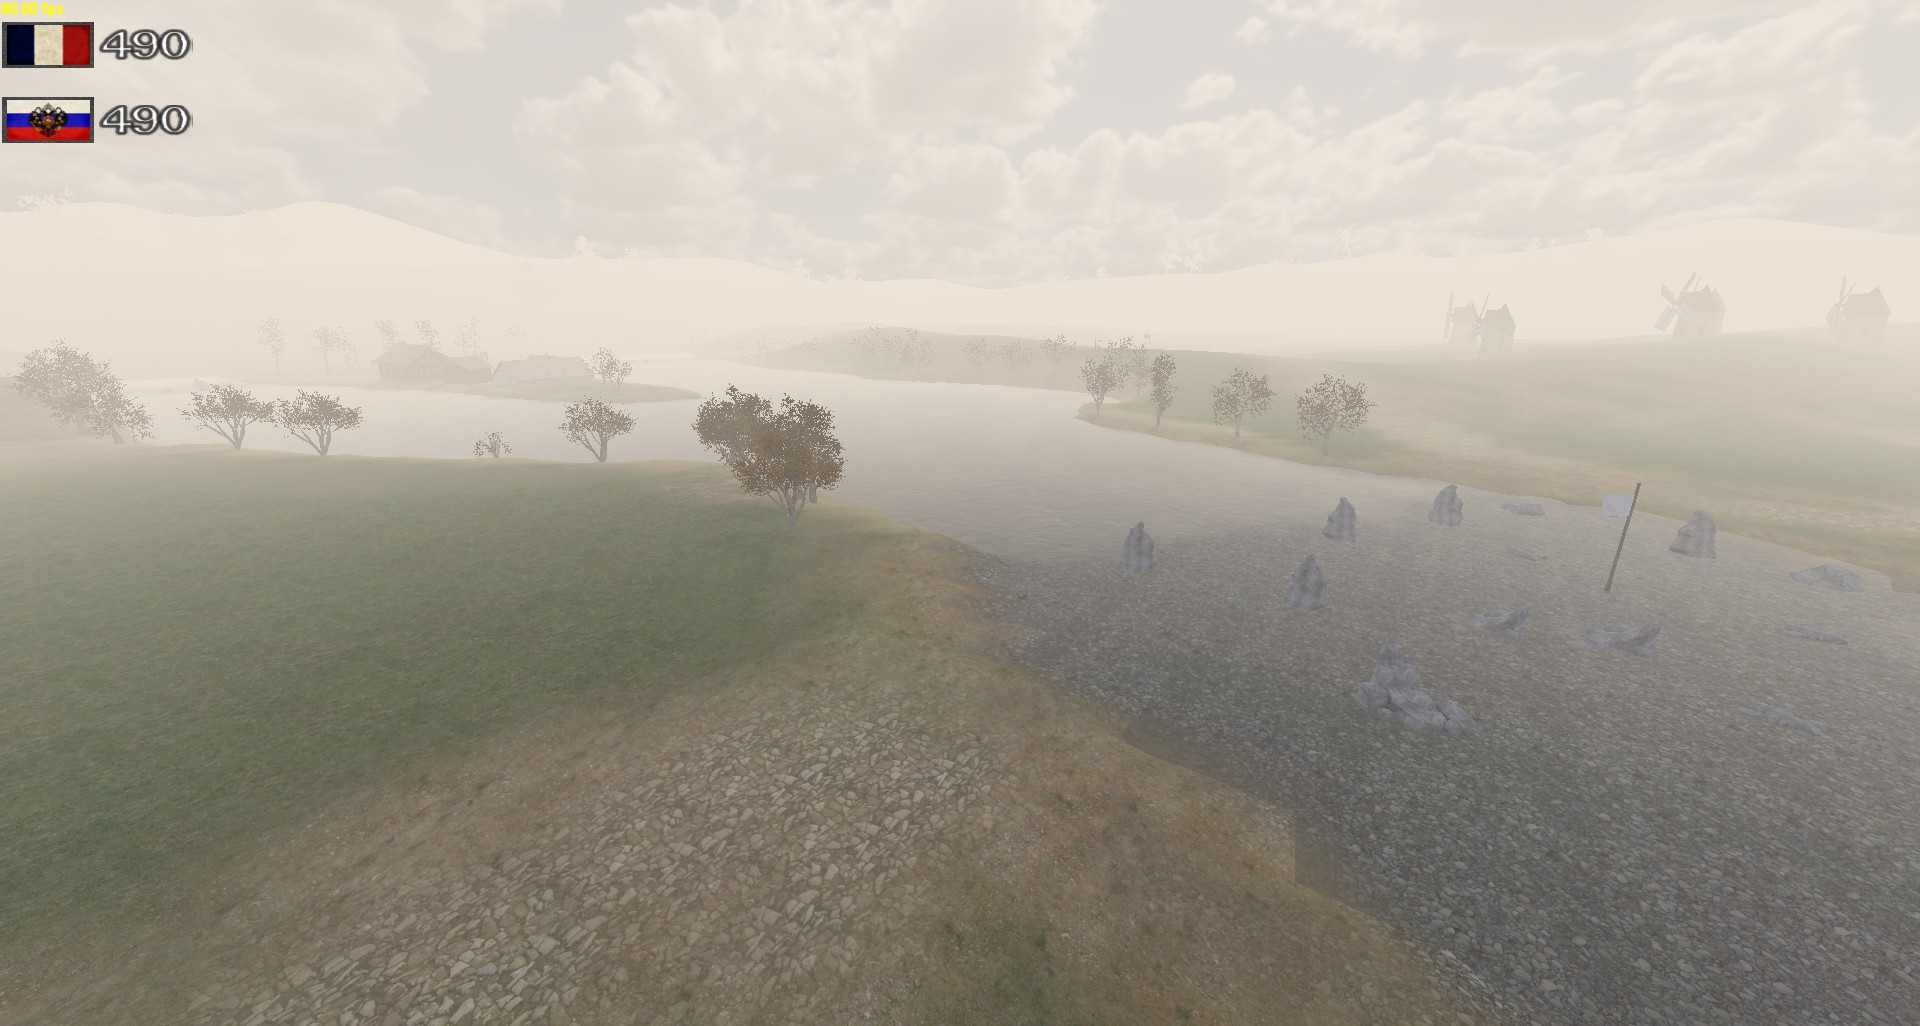


 Events will consist of 4 Siege Rounds, 14 minutes each, played across two maps so each team gets the opportunity to play both attackers and defenders twice.